Forgive me for I have sinned, I took pictures in poor lighting. Many pictures. And I plan to post them on my blog. Forgive me, please:)
This was such a massive project! I have an EIGHT foot long wall and EIGHT years of pictures that have been sitting and waiting for something to be done with them.
Enter Ambition.
I finally decided that it was time to hang my pictures on my wall. But I didn't want to put 80 holes in the wall in order to hang 28 pictures. So, I got this idea . . .
I used butcher paper for a template.
I had to tape a massive amount of it together to make it long enough. In hind sight I wish I had used wrapping paper or something was all one piece, but hindsight is always 20/20
I spread out the paper and taped it all together . . . those cute little legs belong to my one year old:) by the way.
 After I got my paper all situated and taped together (and put my two youngest to bed so that they would stop trying to run on my paper) I arranged my frames on the butcher paper the way I wanted to hang them on my wall. This took a surprising amount of time.
I decided to lay them out somewhat chronologically. I began with my hubby and I and then went to the next child and the next and so on. It became a very abbreviated story of our life.
 Once I had the frames where I wanted the, I traced around every single frame with a black marker so I would remember the placement. (I also took pictures so I could refer back to my camera- 28 pictures is a lot to keep track of)
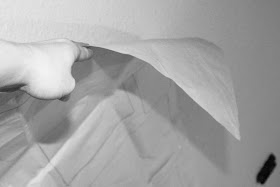
Then I hung the butcher paper on the wall using push pins, you could use painters taper.

Then I hammered a nail in to the butcher paper. Pay attention to where the hanging bracket is on the back of your frame.

Then I hammered a nail in to the butcher paper. Pay attention to where the hanging bracket is on the back of your frame.


Great idea. This would have saved me so much time when I did my ancestor wall... next time :)
ReplyDeleteI love it!
ReplyDeleteOOOOOOOOoooooooOOOOO I can't wait to see the wall! It looks awesome :) What a good idea, I usually do the 80 hole thing. . . but this is a better idea!
ReplyDeleteI have been doing the paper taped to the wall thing a few times, but the addition of marking the holes on the paper made it so much easier. Thanks Amy, when I was taping my paper to the wall on Saturday I thought of you!
ReplyDelete