A Dumping Ground For Good Ideas!

Everything That Makes A House A Home!


Monday, August 15, 2011

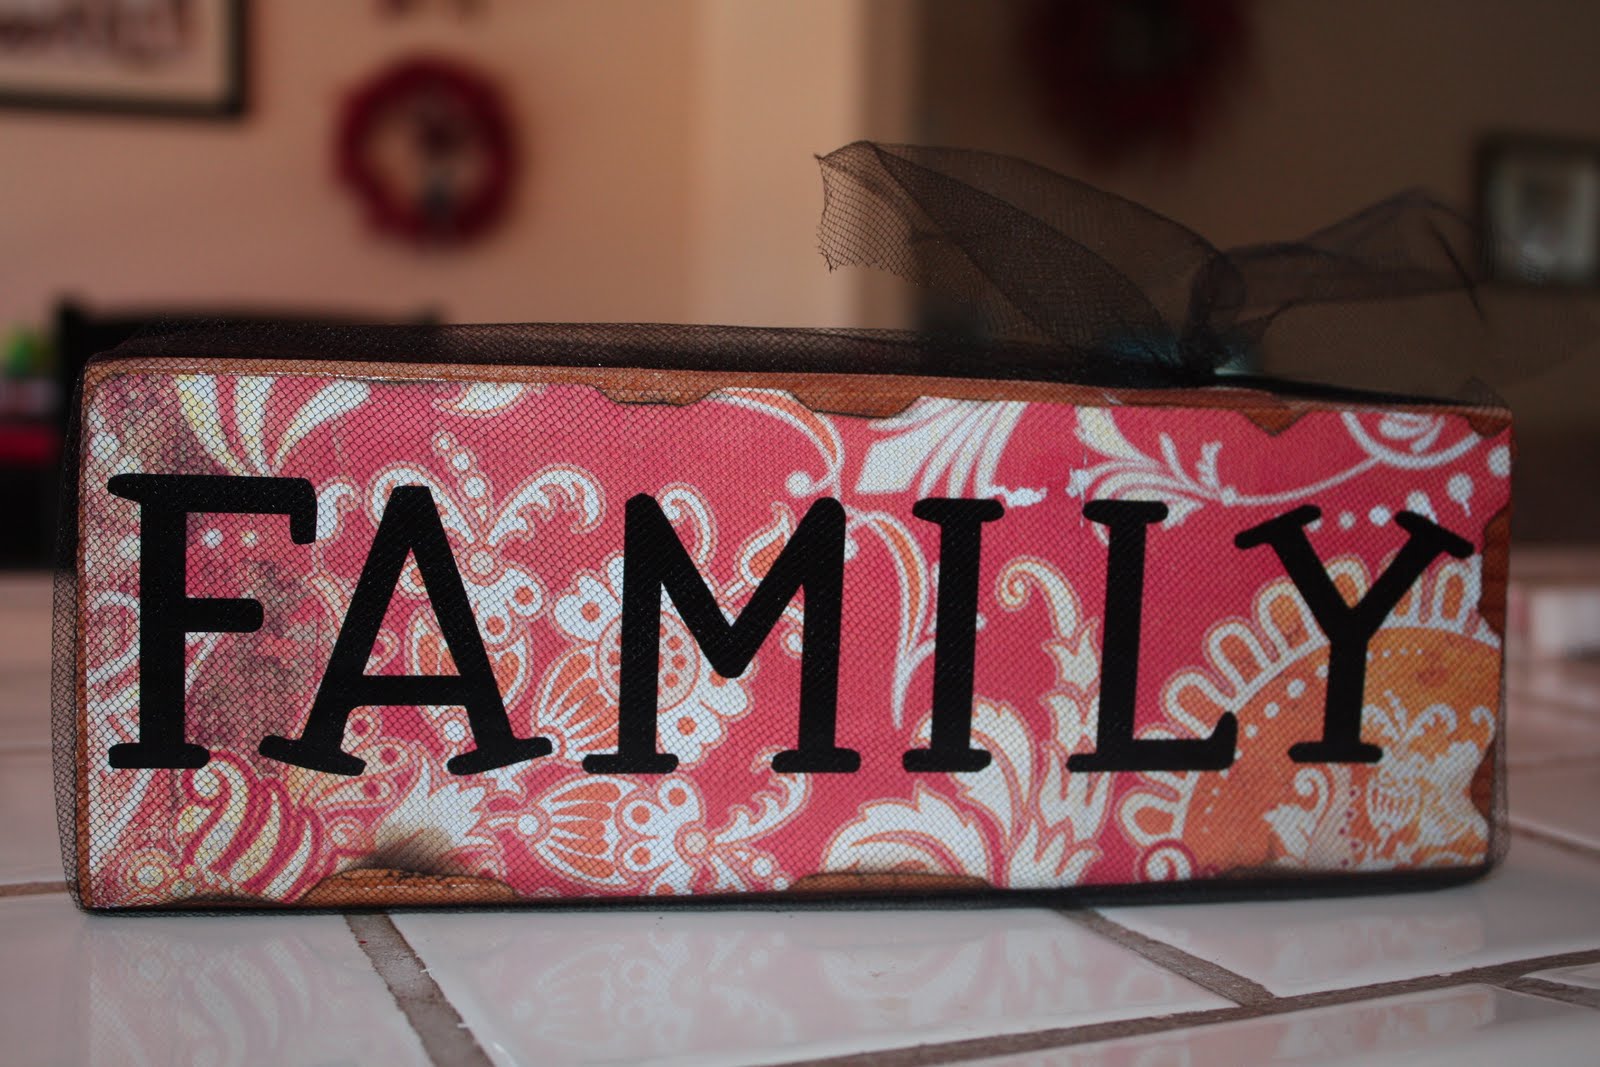
"Family" Solid Block Tutorial

Here is a preview of this super easy craft that YOU can make!


Even your little ones can do this.
You need the following supplies:
Modge Podge
paint brush
tulle
a wooden block (I got mine from my neighbors back yard and sanded it- and yes, I got permission)
vinyl or stickers (I used vinyl this time around)
matches
scrapbook paper

1. Measure the scrapbook paper to fit your wooden block


2. Lightly burn the edges (kids could omit this part) I used a candle because I couldn't hold a match and take a picture at the same time:) I'm not that talented!! You might have to put the edges of your scrapbook paper under water to extinguish the flame and stop the paper from burning. Sometimes it just keep smoldering.


3. Apply modge podge to the wood with your paint brush and apply the scrapbook paper.


4. I pressed the paper down with a paper towel to make sure to get any bubbles out.


5. Apply vinyl or stickers


6. Measure a length of tulle to wrap around the block.


(I used to pieces because mine had already been cut into strips to make a tutu. but if you are buying tulle for this project you can probably use one piece.)


Pull taught and tie around the back.


7. Wrap your second srtip of around the bottom and tie on the top.


Yahoo! You just made something cute to adorn yout home or give as a gift!

305

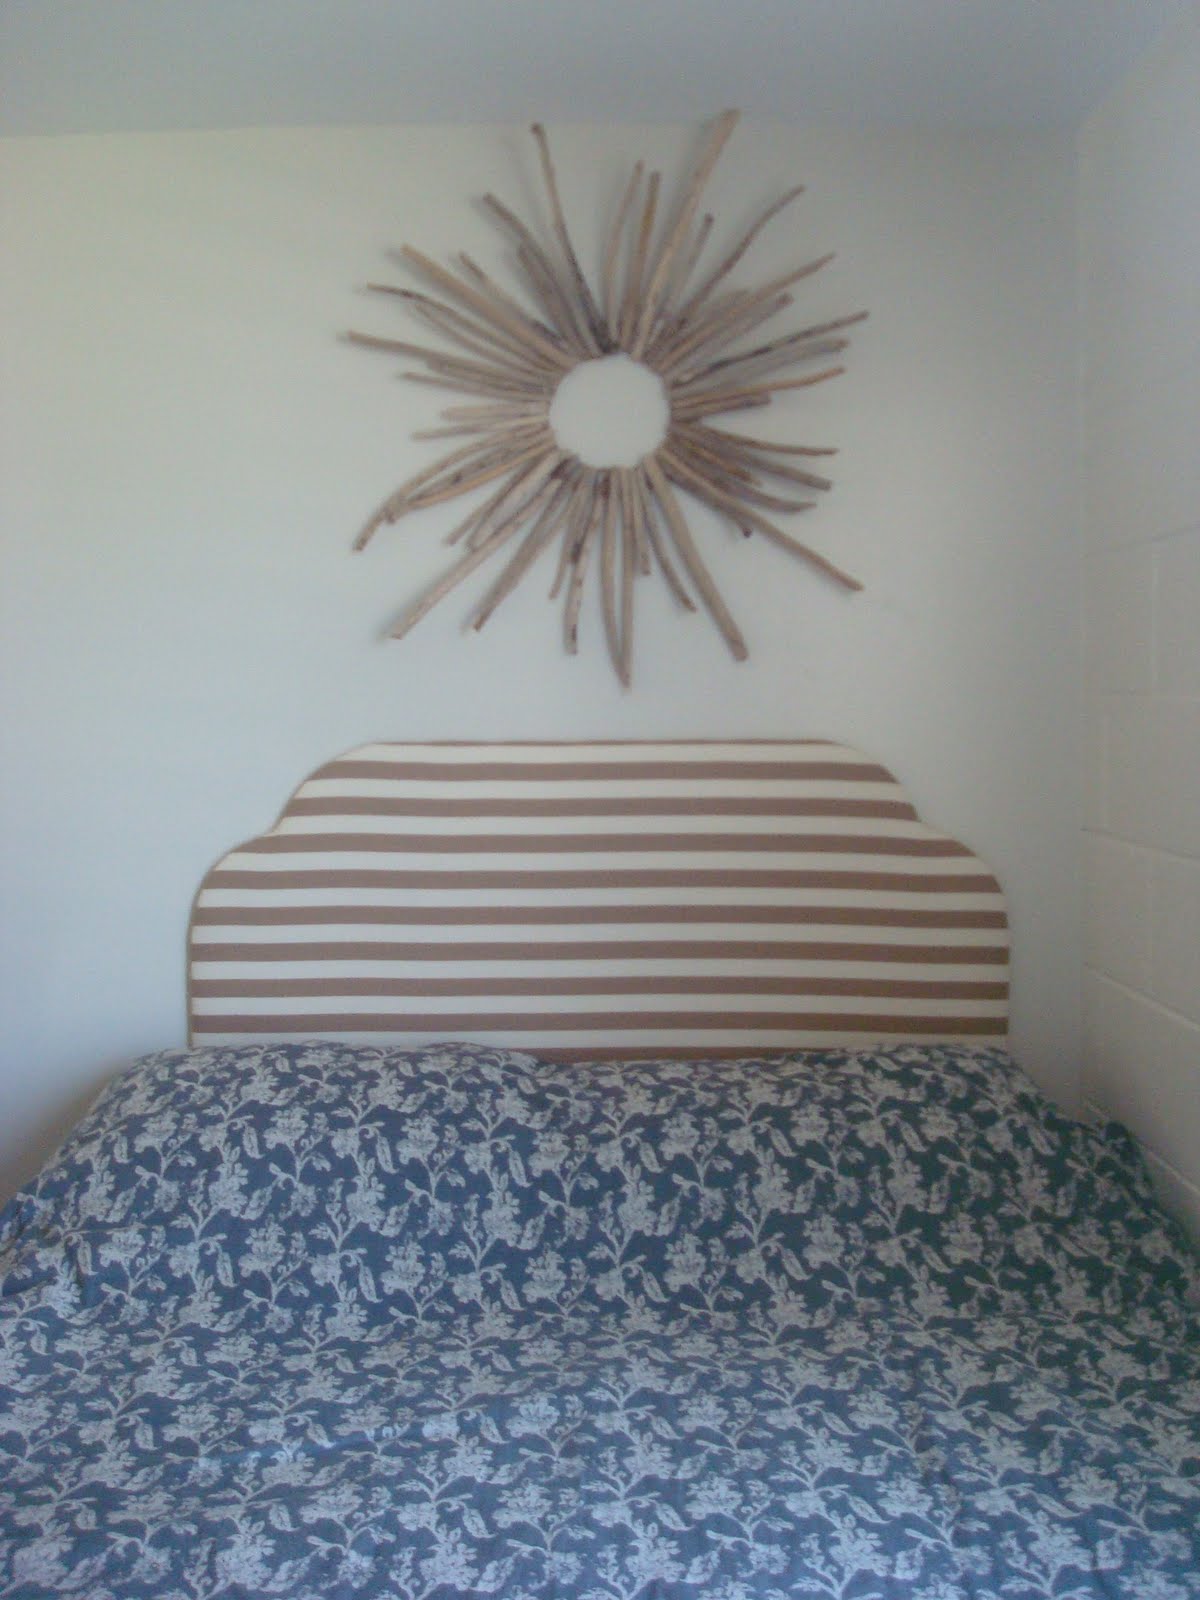
driftwood sunburst wreath

This craft is so easy and cheap! I have this hanging right about our headboard. 

This tutorial is actually done by The Little Apartment. I made this before ever seeing this tutorial and it came out looking just like it. So here it is..


It was really easy to make. You just need a few items:
driftwood
small saw
hot glue gun and glue
wire wreath frame
 (I just recycled one that I already had)

The first step is to cart that driftwood home from the beach. Try to find pieces that are pretty, white and sanded smooth by the ocean. I like to find a few funky shaped ones also to add interest. 

This is mine.


Gather your supplies (listed above) and your ready to go.


It's a good idea to lay the pieces against the wreath form to see how they lay and where you need to cut to start.


Saw as straight of an edge as you can and line it up near the edge of the wreath frame, overlapping a little. Secure it with a good amount of hot glue.


After attaching the larger pieces in a layer around the frame, I went back around with smaller pieces to hide the open spaces in between the first layer's pieces,


And presto: driftwood wreath. It can be a bit heavy so you might want a hand moving it to the place where you want it hanging (thanks hunny!)


Saturday, August 13, 2011

SpOt LiGhT

Don't you just love this Head Band! I do . . . find the free tutorial here from "Six Sisters Stuff"


I also think this necklace is so fun and cute Though I wear my hawaiian kukui nut necklace plain and proud without fabric covering it up;) I suppose if I had several I wouldn't mind transforming it! You can find the free tutorial here from "Sugar Bee Crafts!"


Enjoy!

xoxo,

Amy

245

Two Layer Girls Skirt Tutorial

Now, I am anything but a seamstress.


Before I learned how to make this skirt, the only thing I was good for was sewing on buttons and stitching up straight lines and I owe those meager skills to a young women's activity night at church. I took Home EC as a kid and what I remember most about that class is getting a sewing machine needle stuck in my finger when I was trying to remove some stubborn thread for a class mate. She forgot to taker her foot off of the presser foot. Ouch! That earned me a trip to the nurses office and a slight aversion to sewing machines.


But guess what?


I made this skirt and You can too!


This is what I used:
A Sewing machine:)
White thread
2 yards pink fabric
2 yards green fabric
1 yard white fabric
1 inch non roll elastic
scissors
pins
safety pin or giant paper clip


I started out with the bodice.


My daughters waist is 23 inches.


I doubled that measurement to 46 in long and made it 11 inches in length.


I folded it in half, turned it inside out and sewed the side together


I hemmed the top and bottom side once and then flipped that hem over and hemmed it again.


This is what you should have so far.


Next I cut the fabric for the bottom layer ruffle. 57 inches (around the waist) long and 7 1/2 inches width


(**)Turn inside out, fold in half and sew the sides together.


Hem one side once, then flip and hem again. This will be the very bottom of your skirt.


Now for the unhemmed side you are going to create a gathered look. Start by allowing yourself plenty of thread from the sewing machine.


Crank up the tension to a level 6.


Start at the hem and carry on your way. When you have sewed all the way around the skirt and find yourself back at the hem remember to again allow yourself a lot of extra thread before you cut. You will use this thread to adjust the level of gathering on your skirt.


If you pull the extra thread tight it will tighten the gather on your skirt, if you want to release some of the gather then you will gently pull the gatherings towards your loose thread and it will release the tension.


Below is a picture of the fabric that you have just gathered. Now you are going to want to adjust that layer to match the length of your bodice so that you can sew the two together. Gently pull out the gathering to adjust the tension on the skirt.


When you have the "gatherings" exactly at the desired tension, you must tie the extra thread together (from the front and back of the place where you began and then ended) so that the rest of the "gatherings" won't be let out.


I pinned my hems together and then began to sew the the two pieces together inside out so that the white layer would be on top when the skirt was being worn the correct way. If you feel more comfortable pinning the fabric all the way around you may do so.:)


Viola! Take a deep breath . . . you are almost done! You can do it!


a close up of what the joined pieces should look like:)


Now it is time to insert the elastic. I measured out 23 1/4 inches so I would have room to sew the elastic together (remember my daughter's waist is 23 inches)


Making sure the skirt is inside out, I folded over the very top of the skirt allowing enough room for the elastic to fit inside. Again you make pin all the way around the skirt if you would like to, but in my case, I pinned off a short area in which I did NOT want to sew. The area between the two yellow pins is where I will insert the elastic.


Sew the fold into place.


When you are done, attach a safety pin (or stick the unfolded end of a giant paper clip through the elastic) and thread it through the little home you just made for it. Don't let go off the loose end or you will have a devil of a time trying to reclaim it.


I like to pin both side together while I am adjusting the fit of the elastic through the skirt so I don't lose it:)


Sew the elastic together, go over it several times. (my finger is not bleeding, I don't know why it looks like that)


Once your elastic is sewed together you can pull it all in to the fold and sew up the gap.


Now for your top layer ( 57 inches long and 12 1/2 inches from waist to knee) Repeat exactly what you did for the first ruffle (** where the stars are) until you get to this point.


Now life gets a little tricky, but don't worry you can do it!
Arrange the gathering so that it fits the skirt just below where you have sewed


the elastic band in.

Once it is arranged to your liking remember to tie off the long ends of thread that you saved for adjusting the tension of the gathering. (tie off the sides that are front and back from each other from the starting point and ending point.)


Fold the messy part of the fabric under ever so slightly so that it won't be seen when you are wearing the skirt. Pin into place . . . I didn't do that and I so wish I had. Sometimes I had to sew over some thick parts of fabric and I was afraid it would look horrible, but you really can't tell. So take a deep breath and plow on through.


When you are finished with this part . . . guess what . . . you are done! Hip, hip, Hooray! (My New Zealand Friends actually say that!)


Cut of any loose threads and admire your work!!!


You can adjust the measurements any way you would like ti fit kids young or old:)


Enjoy!


xoxo,


Amy


256

Thursday, August 11, 2011

And the Winner Gets . . .

This is It!


This is the headband that will be shipped to the Watkins Familia tomorrow!


Thank you for being a follower!


Me and the SIL's really appreciate it!


So, now I can tell you . . . I was out of town when we hit 10 followers and I wasn't prepared! I don't think it is ever a good idea to broadcast on line when you aren't at home! So I offer up my apologies for running late on the whole give away thingy:)


Ready For the Next Give Away ?


This is the deal . . .


50 Followers = another Head Band Give Away!!


Tell your friends about our blog and about the give away.


You Can Earn . . .


One Entry for Following


One Entry For Advertising on Your Blog.


One Entry For Advertising on Face Book.


That means you could be entered to win THREE times!


I'll know if you are a follower, you will automatically entered, but the only way I will know if you advertised on your blog of Face Book . . .


is if you leave me a comment.


Happy Crafting!


xoxo, Amy


Saturday, August 6, 2011

Rainbow Rapunzel Cake


Hello! I am super excited to be a part of this blog.
I am Amy's sister-in-law, Shannon.
I married her brother, Sean, who has been telling me for 2 years that I need to have a blog; but, lets face it ~ it's kind of intimidating! So, here I am facing my fears, thanks to Amy ;)

For my first post I thought I would share the cake I made for my daughter's 9th birthday.
Since she was born on St. Patrick's Day we talked about different elements that make that day special. When we talked about Leprechauns and how they have gold at the end of rainbows, she wanted a rainbow cake. So, that I what I made.


STEP 1: COLLECT SUPPLIES

The first things I did were preheat the oven and gather everything I needed
to make a mess in my kitchen.

1 BOX WHITE CAKE MIX
{we like Pillsbury since it has pudding in the mix YUM!}
+ INGREDIENTS FOR CAKE
{I think you need eggs or egg replacer, oil and water}

CAKE PAN(S)
{I used 1 large rectangle, but rounds would too}

6 BOWLS
{1 large siz and 5 small/medium size}

2/3 C MEASURING CUP

RUBBER SPATULA

PAM SPRAY

FLOUR

2 HOT PADS

TIMER

SPATULA
{I used my large surface one that we use for flipping pancakes}

1-2 TUBE WHITE FROSTING

FOOD COLORING

FOIL-LINED COOKIE SHEET

AN AFTERNOON AND A WILLING CHILD ;)

I did not decorate the cake. My husband's Aunt Lisa did.
I will ask her where to find a tutorial on how to do it, then I will add it.


STEP 2: MIX THE CAKE

Next, I mixed the cake the cake according to the instructions on the box. Then I separated the mix into the 5 smaller bowls, and left some in the large bowl. I had 2/3 C mix in each bowl.
So it should look like this sans the food coloring I added prior to taking the picture.


Next, I added a whole lot of food coloring to each bowl. I just used the kind you can pick up at the grocery store ~ like the kind you dye eggs with. If you have the cake food coloring then by all means use that because the color might be richer. I don't make more than 2-3 cakes a year, so I didn't want to invest in those ones.

For red, yellow and blue, I put about 1/3 teaspoon of coloring in each bowl. For orange I mixed red and yellow, but more red than yellow. For green I mixed almost equal parts of blue and yellow, I think I put just a little more blue. For purple I mixed equal parts red and blue, but it almost looked black so I tried to fix it by adding a whole lot more red. It came out looking decent so what can I say? When I was putting the food coloring back in the box I noticed a nifty little chart that says exactly how many drops of each color to mix to get the desired color. . . But thanks to passing kindergarten I knew how to mix the primary colors!


This is how much blue dye I used. It wasn't vibrant enough for me, so I ended up doubling it.


Lexi, little chef in the making.


It looks like candy


I let her do all the mixing of the colors


STEP 3: BAKE THE CAKE

This is the tedious part ~ I only had 1 large rectangle pan, so I had to repeat this step 6 times!

First, take your clean pan and spray it with PAM on the bottom and along the edges really well. You don't want any trouble taking the cake out since it's going to be really thin.

Next, add a small amount {I think it was about 1-1 1/2 Tbs} of flour and dust
around the inside of pan. I was told that this helps the cake to come out easier. I'm not sure if it why this is, but it works pretty good. Make sure that you get the flour all along the bottom and the sides. Dump the excess flour in the trash.

I started with the purple layer and worked my way backwards through the rainbow, so that red would be on top just like in a real rainbow. Pour 1 color of the mix in the pan, then use your rubber spatula to spread it through out the pan as evenly as possible.
I set the timer for 10 min and it cooked it perfectly. Remember I used a large rectangle pan,
so it you are using round or any other shape, you may have to give or take a little on the timing.

I used the large spatula to gently separate the cake from the pan; then I quickly turned the pan upside down on the foil-lined cookie sheet. I washed the pan then repeated for each color of the rainbow.


While the first layer was cooking, Lexi said she wanted purple frosting with Funfetti sprinkles in between each layer. So, we mixed our red and blue again and got purple frosting. We still didn't use that chart. ;) Because each layer was so thin, it cool pretty rapidly. So, so while we cooked the blue layer, we frosted and sprinkled the purple layer. We did this for each color. If you are going to just frost the cake with normal frosting, then make sure that you have both tubs of frosting. We used 1 whole tub for the filling.


The last thing to do before the enjoying the cake it to frost or decorate the outside.
Sean's Auntie called that morning and offered to make Lexi a Tangled cake, since:

a) Lexi LOVES that movie {understatement of the year}
b)Lisa is uber talented and make awesome cakes {another understatement}
c)Lexi thinks Lisa is like the Cake Boss

So, I dropped my cake off at her house to let her work some magic. You can do what every tickles your fancy. For those interested in how she frosted it, I will ask her where to find a tutorial.
* She said to use something called pastry puff?? I guess it comes in a box, just follow directions to mix it. She said she painted the inside of a pastry bag with food coloring to get the strip look in the hair. I'm not sure where to get this stuff, but I'm sure a google search might bring it up.

I don't even like cake, I am really more of a cookie person ~ chocolate chip cookie person to be exact ~ and I usually skip out on cake. There was something tempting about the bright colors of this cake though, so even I had some, and it was yummy!


VARIATION:
Instead of cooking each layer individually, you could layer them
all in the same pan. Put the purple in first, spread it out, then the blue and so on. You could bake it like that or run a knife through it to give it a marble effect. Another idea is to drop spoonfuls of each color randomly in the pan until you have used it all up. Then cook according to time on the box. If you try any one of these variations, please link to this page so I can see what you've done with your crafty self!

All you have left to do is enjoy :)