A Dumping Ground For Good Ideas!

Everything That Makes A House A Home!


Wednesday, September 21, 2011

The Pumpkin Who had Lips

It may be a little early to start thinking about carving pumpkins, but what the hay! A good idea always keeps.
I don't always love to scoop pumpkin guts out of pumpkins and not all of my kids are old enough to use knives (even safety knives) to carve a jack-o-lantern, so I think this is a great, not to mention cute and original idea!


How cute is she?! She was named Eve by my blond daughter (we call her our vanilla- my daughter, not the pumpkin) ! To recreate her look you will need:a pumpkin* Toothpicks*radishes*red bell peppers* Kiwi* cucumber* one carrot


Cut the fruits and veggies and attach with toothpicks in a way that makes you smile! I personally love Eve's radish earrings:)


My Brunette (we call her our chocolate) named her pumpkin Kelly. You can see that I had to do a little gut scraping and carving on this pumpkin. Oh, well, to each her own:)


If you try this (it is so easy) I would LOVE to see pictures of how yours turned out!


Happy Crafting!


xoxo, Amy

Tuesday, September 20, 2011

I Shoot People!

I saw this medallion from the Rusted Chain and thought it was just so clever!


I love photography! I love capturing precious moments that would other wise become lost in the recesses of our mind. I think it is the Buddhist Monks who won't have their pictures taken for fear that such an act will cause them to lose a piece of their soul. I think it does just the opposite. I think a picture can preserve a piece of who you are and tell a brief story to future posterity.


With that said . . . here is a stage of my little boy that I always want to remember. His superhero phase. These pictures were taken on a deeply overcast day. The clouds in the sky were dark and heavy and very threatening. In other words, it was perfect lighting!


I did not pose this boy at all. I told him: "You know, most people didn't even know who Superman really was because in the day time he wore a hat, a white shirt and a tie and worked as a newspaper man." After saying that, I couldn't stop the boy from becoming a superhero!


More pictures can be found here.


Happy Crafting!


xoxo, Amy

Monday, September 19, 2011

1 Fruit, 2 Meals: Garden Fresh Tomato Recipes ~ Spaghetti Sauce and Minestrone

Okay, so I totally wasn't thinking about taking pictures while I was making these dinners, but I promise they are yummy!!!!


Earlier in the summer, my mother in law planted a few tomato plants that have been very kind to us! We've made tons of yummy salsa. But with this last harvest we decided to make something a little different ~ spaghetti sauce. We had tons left over, so on day 2 I used it to make super yummy minestrone.


What You'll Need For Day One:
20-30 Medium Sized Garden Fresh Tomatoes
1 chopped onion
2 Tbs Chopped Onion [I think its like 1 med-large clove fresh]
3-4 Bell Peppers [Red, Yellow and Orange are sweeter than Green]
Olive Oil
Fresh Basil
Fresh Rosemary
2 Small Cans of Tomato Paste
Salt & Black Pepper
8 quart pot (like for cooking noodles)
13 in fry pan
1 large bowl filled with ice water
Food Chopper or Blender


Start by bringing water to boil in your large pot and filling your bowl with ice water. While you're waiting for the water to boil, dice your onion and peppers. If you squeeze fresh lemon juice on the board before you cut, and make sure your knife is sharp you won't have a cry fest wile chopping. I learned this while working in a kitchen and it is the best kept secret! Its also good for cutting hot peppers. Anyways, put the onions and peppers in the fry pan with the garlic and about 2-3 Tbs of olive oil over medium heat.


Next, wash all your tomatoes, then once the water is boiling drop them into the water for about a minute. Spoon them out of the pan into the ice water and the skins will pretty much fall off. After I learned this technique it really made me question all those commercials for steak knife that cut concrete then slice the skin off a tomato, hmmmm. . . .


Anyways, after you get the skins off, cut the part where the stem was [the belly button?] off. Quarter them and put them in your food chopper/processor or blender until they are juice. Save 4-5 to dice if you like a chunkier sauce.


Wash your pot out, fill water then bring to a boil and add your noodles with some olive oil to help them not stick together.


After you finish with the tomatoes and noodles, wash your basil and rosemary then toss it in the food chopper with a sprinkle of olive oil. You may have to stop and push the contents down to get to the right consistency. If you are using dry ingredients, I would use probably 2-3 Tbs of each. Put into your sauce pan and add the cans of tomato paste. Add about 1-2 tsp salt and 1-2 tbs of black pepper. Sorry I usually just eye-ball things when I cook. Its so much more forgiving than baking! ;)


Stir the noodles and sauce every few minutes, until noodles are ready, then rinse em and serve!!!


What You'll Need For Day 2:
Leftovers From Day 1
[there should be about 2 1/2 - 3 cups]
1 Package Noodles
[I used alphabets from Trader Joes, but shells, spirals or mac would work too]
1/2 Bag Baby Carrots [chopped into thirds]
6-8 Skinned & Cut Medium Sized Red Potatoes
1 Can No-Salt Added Peas
1 Can Pinto Beans
1 Can White Kidney Beans
Water
3 Bay leafs
8 Quart Pot
4-6 Quart Pot


For this meal, you'll want to skin, wash and cut your potatoes. I cut them in half, then thirds. Chop your baby carrots into thirds or quarters then add both veggies to the pot and cover with water. Bring water line to 3-4 inches over your veggies.


In your smaller pot, cook your noodles with some olive oil so they don't stick together. The veggies and noodle should be done around the same time. You'll leave the veggies in the water, but drain and rinse the noodles; then, add them to the large pot and reduce heat to low-medium. Rinse the peas and beans then add to the pot as well.


Dump your left over sauce into the pot, add a little more salt & pepper and some dry rosemary, basil, oregano and thyme. Again, sorry I just eyeballed everything, so its probably a couple of tablespoons of everything. I also added some garlic salt. Add 3 bay leafs and simmer your soup for about 20 more minutes. This well let the flavor set in and thicken the sauce a little. You can add a little more water if you like more broth. The pot was about 4 inches from the top, so it was plenty to go around!


When your soup has simmered, fish out the bay leafs so nobody eat them. They are only good for adding flavor. Dish up and enjoy. We added some Parmesan cheese and it was super yummy. I have been doing really good with my vegan diet, so I allowed myself this cheat and it was sooooooooo worth it!! My favorite part of these meals is that most of the ingredients are fresh! Fresh ingredients taste so much better!!!


After we fed 4 adults, one 9 year old and a second helping to my husband, we still had about 1/2 a pot left so I filled a gallon sized ziplock to the brim and froze it for a night that nobody fill like cooking. I love that from one tomato harvest we had dinner for 3 nights!!


Anyways, next time I make something uber yummy like this I will remember to take pictures I promise!! In the mean time forgive me this time please :)

Sunday, September 11, 2011

Yummy Pumpkin Muffin Recipe . . .Because It's Fall!

It was a hundred and nine degrees yesterday so I have to keep reminding myself that we are in fact heading into the Fall season. I saw a recipe on Pinterest for these yummy pumpkin muffins. The recipe from Sweet Verbena is a two ingredient recipe, but I made it more complicated:) I turned it into a three ingredient recipe. What is the third ingredient you may wonder . . . chocolate chips. Mmm.


In a large bowl combine pumpkin and cake mix. Blend until creamy!
Stir in chocolate chips . . .look out for four year olds who like to snitch.


Fill your cup cake pan. These will not rise, so however you plop the mix in is how it will cook.


Bake on 350 degrees for 20-25 minutes


They come out so yummy!


Add cream cheese frosting for an extra treat, but they are also very yummy without:)


Happy Fall!! xoxo, Amy

Thursday, September 8, 2011

"Fall" In Love With These DIY Placemats!

Hi 24 Followers! I am so excited that we are just about at out half way point! Remember that beautiful "Cambria Rosette Headband" that we will give away when we hit 50 followers is waiting for you! But on another note, let me ask you this:

Are you ready for the FALL?

I am!

Summer was once my favorite time of the year.

I couldn't wait for the school year to end so that I could spend my days

splashing in the ocean waves and lying on the sand.

After I graduated from high school I went to college in Hawaii,

so my love for the surf and the sand only grew.

Now, I live in the desert.

The ocean is no where to be found and summer temps often rise above 110 degrees. In light of my new surroundings, Fall has grown on me considerably. I welcome the break from the summer heat and look forward to cooler days and nights.

So, I say, lets bring in the Fall by making cute placemats to eat yummy dinners on!

Simple and easy!

I was inspired by all of the burlap creations I had been seeing lately. I wanted to try to make a few different things but settled on these placemats.

You will need:
1.5 yards burlap (walmart has some so I am told)
Placemat to measure out your placemat size (12X16 inches)
brown grosgrain ribbon
green grosgrain ribbon
Sewing Machine (if you don't have a machine I will give an alternate tip)
needle
thread
Hot Glue Gun

(are you surprised there isn't any modge podge?)

1. First I laid out my burlap, put my placemat on and literally just cut around it.


This is what the first one looked like:


I did that six more times because that is how many are in my family:)

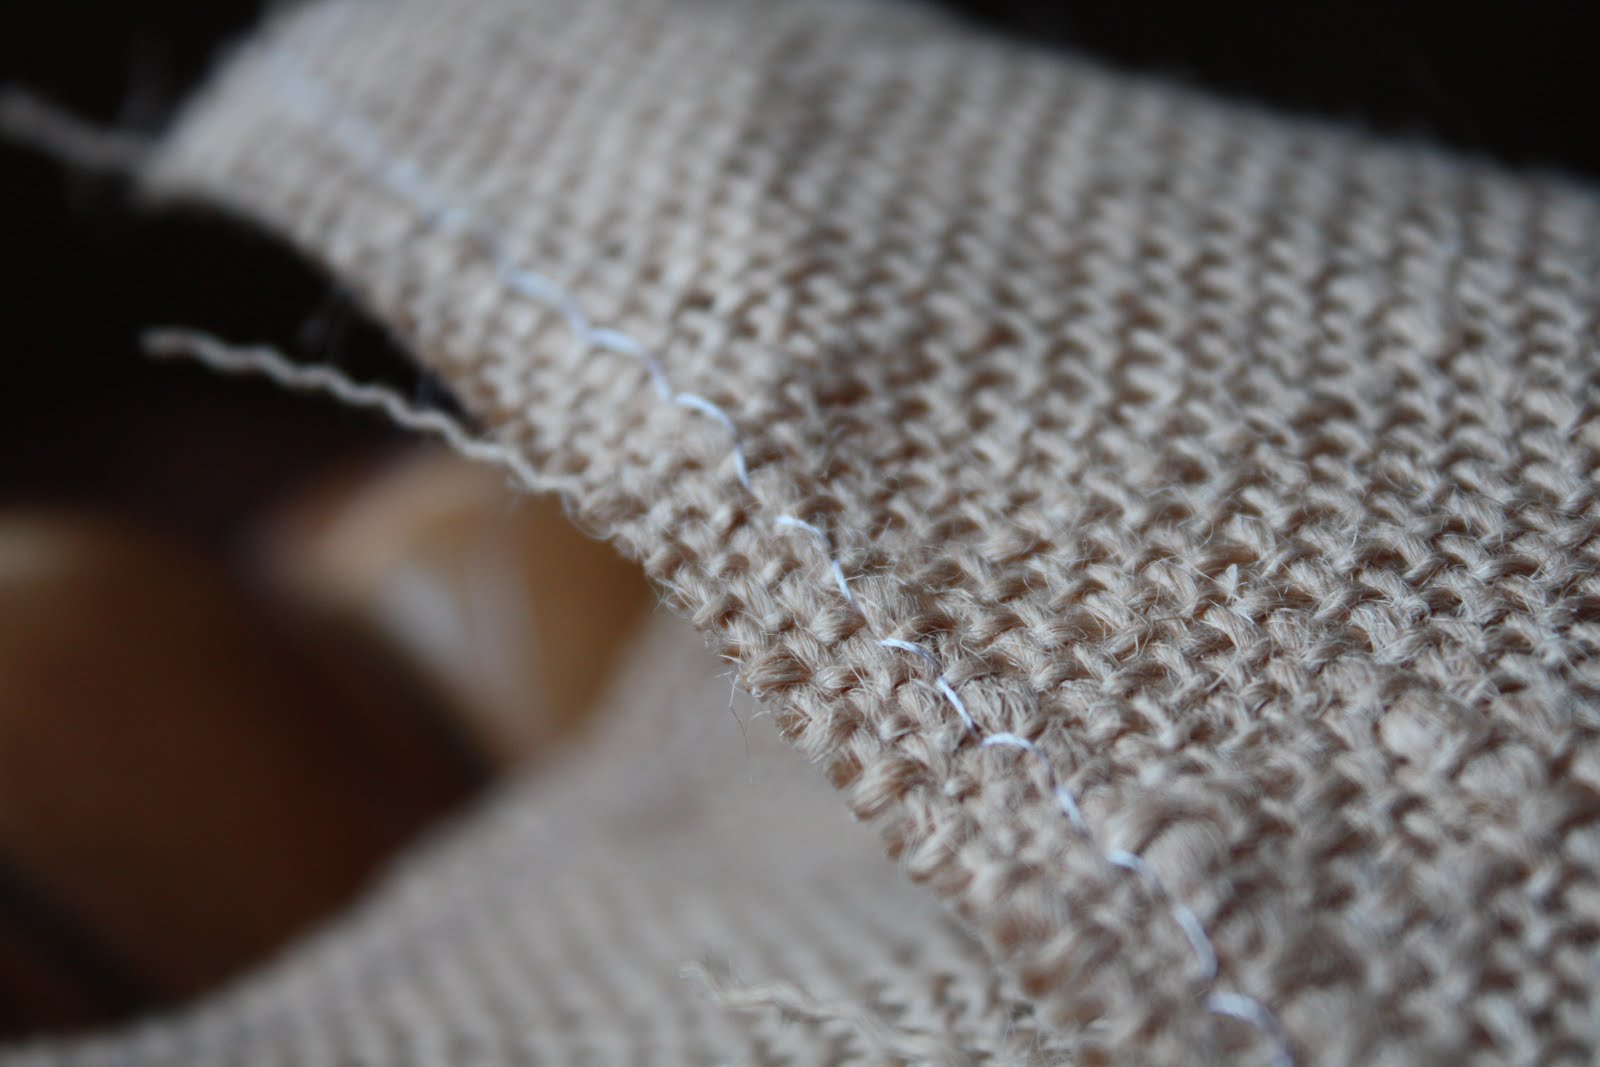
2. I sewed a zigzag stitch with my machine all the way around the edges. It went really fast. But truth be told I have no idea if it will make a difference since I have never worked with burlap. If you don't have a machine: Get a hot glue gun and fold each of the four sides back and glue them down. It will look kind of like you hemmed the placemat. Experiment with your glue a bit because I think it might seep through to the other side of your burlap.


3. Next I used an oatmeal lid to measure out 6 orange circles from fabric I already had to make yo-yo flowers. Shanni gave a wonderful tutorial on this a few posts back.


Now I debated for quite awhile about what I wanted to put on these placemats. Did I want to paint a brown stripe? Did I want to glue ribbon? Did I want to cut out Fall leaves from felt? You could do any of those things and have a cute placemat. After much thought I decided I wanted to make a little pumpkin decal on each placemat.


4. Next I cut of 6 strips of brown ribbon for the stem and tied 6 green bows with white polka dots ( I don't think these were grossgrain) I didn't measure, I just cut and tied.


6. At first I tried to sew the brown ribbon on the burlap but realized my attempts were futile. So I glued it in the upper right corner.


7. Glued the yoyo flower on


8. Put a little glue on the "stem" to add my green bow.


And . . . voila! She is finished!


I just love how they turned out and so did my kids! I love how little, simple things can makes seasons and holidays seem more exciting!

I would love to see yours!

Happy Fall And Happy Crafting!

xoxox, Amy

Tuesday, September 6, 2011

Fabric Flowers - 2 more styles ~ Tangled & Pinwheel


TANGLED FLOWER
[LOTUS or ROSE STYLE]


WHAT YOU'LL NEED:

*Scraps of Fabric

*Scraps of Tulle (diamond & the bigger mesh stuff)

*3 Different size circles to trace
(I used a jar, and the top & bottom of a vitamin jar.
My flower is 3 inches without the tulle)

*Scissors

*Needle & Thread

*Small Piece of Felt

*Hair clip, Pin Backing, or Headband

*Buttons, Beads, Rhinestones or some other blingy for the center

*Hot Glue Gun & Glue


First, you'll need to trace 6 circles of each size onto your fabric.
[18 total]


And, cut 6 squares of tulle slightly larger than each of the 3 sizes of circles. [18 total]
Also, cut 6 squares of the large mesh tulle slightly larger than your largest circle.


You will need to repeat these next few steps for each petal. Starting with the large circles. If using tulle, place the it on the right side of the fabric, like this:


Next, fold the 2 pieces of fabric in half, making sure that the edges of the circle match up,
like this:


Fold in half again, lining up all 4 edges of the circle, like this:


Now, take you thread and double it up on the needle by threading it
then tying both ends together. Fasten to open end of the quarter circle.
Baste stitch by hand along the edge, like this:


Once you get to the other end, pull the thread tight to create a ruffle type effect,
and do not tie off thread, like this:


I know its kind of hard to see in that last picture, so sorry!
It was a little hard with the glare from the shinny fabric + tulle,
but I think you can still get it.


After you finish one petal, you'll start over with the next one using
the same thread as the petal before.
Here is what it would look like if it were a 5 petal flower:


When you have all 6 petals of the large size on the thread,
pull it tight & hold tightly with your fingers.
On the back side of the flower, run your thread through
the first & last petals where they meet a couple of time, then fasten off.
Like this:


This next step is unique to the bottom layer only.
Take your large mesh tulle and fold it in half on its diagonal so it becomes a triangle.


Fold it in half again. . .


And one more time. . .


Now, place it behind a petal, with the point in the center and sew on. I decided that maybe the next flower I make like this I'll only put like 2 pieces of tulle on in between petals, because its cute and looks more, ummmm mature that way ;) But, since this is for my 9 year old, the more princess I could make it, the better. Anyways, if you want to attach it all the way around, just repeat until you get to the beginning again then fasten off and cut thread off.


Here is what it looks like from the front with all the tulle in the back.
I cut the excess diamond tulle from the petals before I
sewed the large mesh tulle to the back.


Now, repeat the steps for the petals for the medium size circles.
When you finish, tie off but don't cut thread. Lay them on top of the bottom layer,
and stagger the petals. From behind this layer, stitch the 2 layers together.
I did a sort of blind stitch, where I attached the top layer fabric [not tulle]
from the large petals to the bottom layer of fabric of the medium petals as close
to the base as I could get. I fastened it off and cut the thread when I got
back to the beginning. I suppose that you could hot glue them together,
but I thought it be too bulky so I chose to sew.


Ok, if you understood that last round of mumbo-jumbo,
you have to repeat it for the small petals layer. Attach it to the medium petals
the same way you chose for the 1st layers.
It should look like this when you have all 3 layers attached.


For the center of my flower, I took about 8 inches or so of the
purple fabric that was left over and made a mini rolled rose.
For those of you who do better with reading directions here is a link
to written directions. They have a ton of pictures up, but it was late a night
when I found this a few months ago & I just needed to see someone do it.
So I searched for a video, and I found this.
They're both the same method, I just needed to see it done. ;)
If you plan to wash the flower at anytime, use a fabric glue, not hot glue!


After I sewed to rolled rose to the center I hot glued the rhinestone to the center of it.


***


PINWHEEL FLOWER
Ok you'll need all the same supplies for this Pinwheel Flower as you did for the
Tangled Flower. I've made them with no tulle and they still look cute, so go with
what looks best for your hair accessory stash!


You'll need to cut 5 circles (all the same size) of each fabric & 5 squares
of the same size for your tulle. You should end up with a total of 20 pieces. You can go up to about 25, but then it starts to be too many pieces.


Once you have all of your circles cut, you'll fold them the same way as the Tangled flower. Insert the needle through the point of the quarter circle and repeat in the pattern you've laid out. For the tulle portions of this flower, I folded it the same way that I did for the tulle on the back of the Tangled flower. Once you have all your piece on the thread, pull it tight & arrange in a circle. Hold it very tightly & thread the needle through the back of the first few petals to secure it, then fasten it off.


I used beads in the center of this flower, but you can pick your own centers.
After you add the center, hot glue the flower to a small piece of felt, trim & attach to clip, pin or headband like in this tutorial. If I attach a clip I like to run a small piece of felt perpendicular to the clip & glue it so it is more secure.

Monday, September 5, 2011

Win This!

I made this little beauty, the Cambria Rosette, and it is the next head band selected for the give away.

You know the give away we are going to have when we hit 50 followers.

If you are a follower, then you will be automatically entered. But there is more . . .

Do you want to be entered more than once? Sure you do . . . its easy.
1. You get one entry for being a follower.
2. You get another entry for advertising on your blog or face book or via email (but you have to let me know that you have done so to be entered.
3. If your friend visits The Craft Bucket and says they heard about it through you, you will be entered again, and again for as many people that list you as their referral. So in the comment section it should say something like:

"Hi, I just became a follower. Toshia referred me to your site!"
That would get Toshia's name entered again as well as the new follower! Clear as mud? Great!


I hope You win!

Happy Crafting!

xoxo, Amy