
How to Host a construction Themed Birthday Party!

Let's start with the Construction themed invitation invitation. You can get something like this on etsy.com from Fancy that Studio. Look for a deal that comes with construction party signs! We got it in the mail about two weeks prior to the party.


So in decoration summary: Lots of construction signs (she even had one on the bathroom door that said "porta-potty!"), lots of Tonka Trucks, cones of ever shape and size, caution tape and plastic construction hats.
Let's move onto the entertainment! For a group of four year old's the fun couldn't have been any better.
She created an obstacle course. It was awesome. I will explain it, then show you the pictures! You can adjust it to what works for you.
1. Weave through the construction cones.
2. High knees through the tires.
3. Go through the tunnel.
4. Walk across the bridge.
5. Go under the caution tape.
6. Run up the stairs. (not one of the kids tripped)
7. Cross the finish line.
The weave

Through the tires


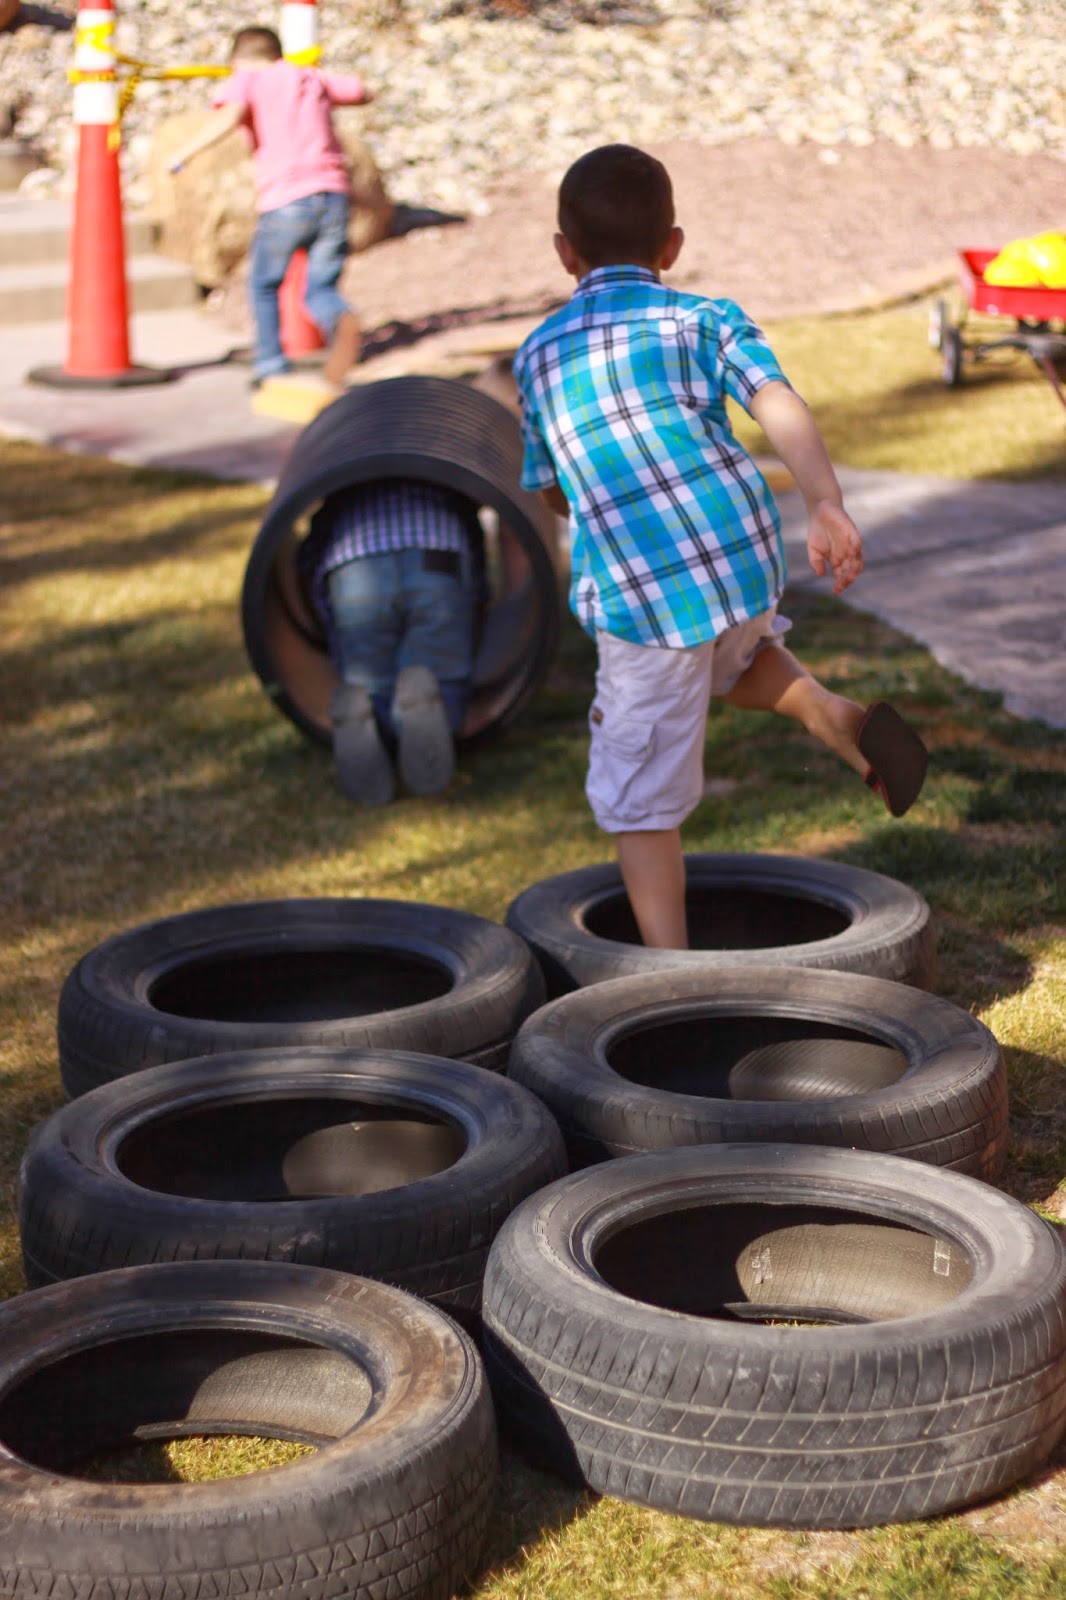
Go through the tunnel


Across the bridge


Under the caution tape and up the stairs

Cross the finish line

The kids did this for 40 minutes straight. Over and over again! No one got hurt or tripped or fell, it was a ll just good fun.
Next on the list, a real live Tonka Truck and make shift wrecking ball! This is another thing that kept the kids entertained forEVER! they would run back and forth between the obstacle course and this wrecking ball!


Timber!!!!

In other entertainment:
A sand box full of trucks and...


Now for the cake and cup cakes!


Party Favors:
Orange and black bags full of goodies that said, "Thanks for making my birthday party loads of fun!"

I had to share this because it was AWESOME! What a great way to make life special! I was so impressed! I would never be able to do all the same things that my sister-in-law did for this party, but there is a lot I could do.
I hope this gives you inspiration for your own party!
XOXO,
Amy


