Now, here's how you can create your own digital scrap book & photo journal template.
First, find a digital scrapbook kit
that you like and download it to your computer. If end up using one that
you have to pay for, you may have to wait for it to be emailed to you.
Most of the ones I found were in zip files & needed to be extracted
once I downloaded them.
Somewhere
on the post there will be a button or link to download or purchase.
Once the file has finished downloading, you will see a box similar to
this:
Double click on the file you want to finish downloading & it will bring up this window:
Click on the Extract To button
Make sure that when you unzip the
file, that you save it to somewhere that is not the downloads file so
you can find it again when you're ready to use it. I unloaded it onto my
desktop, then moved the file to file for scrapbook stuff. They unzip
pretty fast!
Ok now that the download stuff is
through, lets get into how to go from all these different digital
components to a template that is ready for you to put pictures in.
Open your photo editing software. I
have Photoshop; so, this tutorial will focus on using it. It is probably
pretty similar in other photo editing software. Once its open, open up
the paper file that you want to work with. To make the second layout, I
chose the Spotty Dotty Green paper in the Spontaneous Delight pack for
my back ground. This window will be the one you add everything too &
will become your 0 Layer, or Background Layer.
The next thing I did was chose where I
want my picture & how I want it to look like it was affixed on the
page. I chose the green glitter dots from another free download set. I
downloaded a few that night & so I can't remember where I found
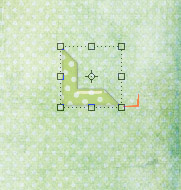
them, I'm sorry! Once you open the corner tabs you'll want to grab the
tab that its in & drag it down so it becomes its own window like
this:
Next, switch to your moving and transforming tool:
Click on the corner tab you chose and drag it to the paper tab. Do that a total of 4 times. It should look something like this:
Next you'll need to click on the rectangular marquee tool and use it to create a guide for where the picture should go.
Once you have the marquee up, switch
to your brush tool. Its the one that looks like a paint brush. Make sure
that the brush size it large enough for you to see while being small
enough to fit under the corner tabs. Draw a small line at each corner to
help you line up your stickers. Then, switch back to the marquee tool
& click anywhere to remove the marquee.
Now, on the bottom right side of
Photoshop you'll see a tab labeled "Layers". Click that to bring up a
list of all the layers you've created in this document.
Go
back to the move & transform tool & click on layer 2. You'll
repeat this for all for corners. Drag it the corner it goes too. If you
put 4 of the same corner tab stickers on your paper don't worry, once
you are working with that layer again its easy to rotate it to the right
direction. Move it to the corner where you want to place it, then hover
your mouse by one of the corners and you'll notice that the mouse
becomes a rounded line with arrows on both sides. If you click while the
mouse looks like that, the object inside the box with rotate whichever
direction you move the mouse to. I tried to capture it in a screen shot
but I couldn't grab the mouse. Here is what is looks like when the
object is selected though:
When
you are done & try to move on, a box will pop up and ask if you
want to apply transformation. The answer is YES. Once you have all the
corners in place, go to layer 0/Background. This will high light the
paper. Go back to the marquee tool & draw rectangle using your
stickers as corners. This will serve a reference line for the erasing
you will be doing next. Once you have the marquee ready, switch to the
eraser tool. The regular eraser is perfect. You don't have to worry
about erasing around the stickers because they are not part of the
background layer. Just follow the outline of the marquee then erase the
rest inside. When you finish erasing, switch back to the marquee tool
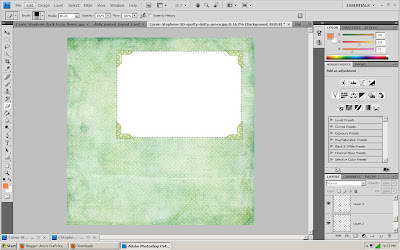
& click anywhere to get rid of the box. It should look like this
when you're done erasing.
To add the glitter embellishments
& the paper space to write on just follow the same steps you did
when you added the corner sticker tabs.
Make sure that you save this as a Photoshop document so that you can manipulate the layers. If you save it as a jpeg the part you erased will turn white & you will have a hard time making the photo fit.
Make sure that you save this as a Photoshop document so that you can manipulate the layers. If you save it as a jpeg the part you erased will turn white & you will have a hard time making the photo fit.
Now that you've created a digital scrap book page, I bet you want to know how to add a picture to it huh? Well, keep your eyes open for the next post!!
Happy Crafting
:)


No comments:
Post a Comment