A Dumping Ground For Good Ideas!

Everything That Makes A House A Home!


Monday, April 16, 2012

Digital Scrap Book & Photo Journal: Place The Picture ~ Photoshop Tutorial PART 2

Now that you've created your template,  lets put some pictures in! 

Open the picture you want to use. You are going to use the same method I described in the last post for dragging the corner sticker tabs to the template. It should look something like this once your picture is moved:


 Once you have moved your picture to the working space your template is in, go to the bottom right hand corner again & click on layers. 


You are going to move your picture from where ever it is in the layers tab all the way down until it is below the background layer. This will pull the picture to the very bottom layer of your workspace. You can just grab the layer and move the mouse to the bottom of your screen; if you hold the button down it will go past all the layers until you reach layer 0. Now it should look something like this:


Click on the picture you uploaded & move it to fit  inside the frame you created. If the picture is too big or too small you can adjust it by clicking the corners and dragging to the desired size. Now it should look something like this:


:)


Now you may want to know how to add the words right? Well that's super easy. Just click on your text tool {it looks like the letter T}, create a box over your writing space, then go at it! You can change the font color & size really easily to. 


Ta-Dah!! You did it! You created a super easy digital scrap book page!!!

Happy Crafting.

:)

Digital Scrap Book & Photo Journal: Creating Your Template ~ Photoshop Tutorial PART 1

Now, here's how you can create your own digital scrap book & photo journal template.

 First, find a digital scrapbook kit that you like and download it to your computer. If end up using one that you have to pay for, you may have to wait for it to be emailed to you. Most of the ones I found were in zip files & needed to be extracted once I downloaded them.

Somewhere on the post there will be a button or link to download or purchase. Once the file has finished downloading, you will see a box similar to this:


 Double click on the file you want to finish downloading & it will bring up this window:


Click on the Extract To button


Make sure that when you unzip the file, that you save it to somewhere that is not the downloads file so you can find it again when you're ready to use it. I unloaded it onto my desktop, then moved the file to file for scrapbook stuff. They unzip pretty fast!


Ok now that the download stuff is through, lets get into how to go from all these different digital components to a template that is ready for you to put pictures in. 

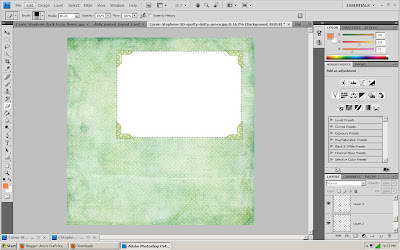
Open your photo editing software. I have Photoshop; so, this tutorial will focus on using it. It is probably pretty similar in other photo editing software.  Once its open, open up the paper file that you want to work with. To make the second layout, I chose the Spotty Dotty Green paper in the Spontaneous Delight pack for my back ground. This window will be the one you add everything too & will become your 0 Layer, or Background Layer. 


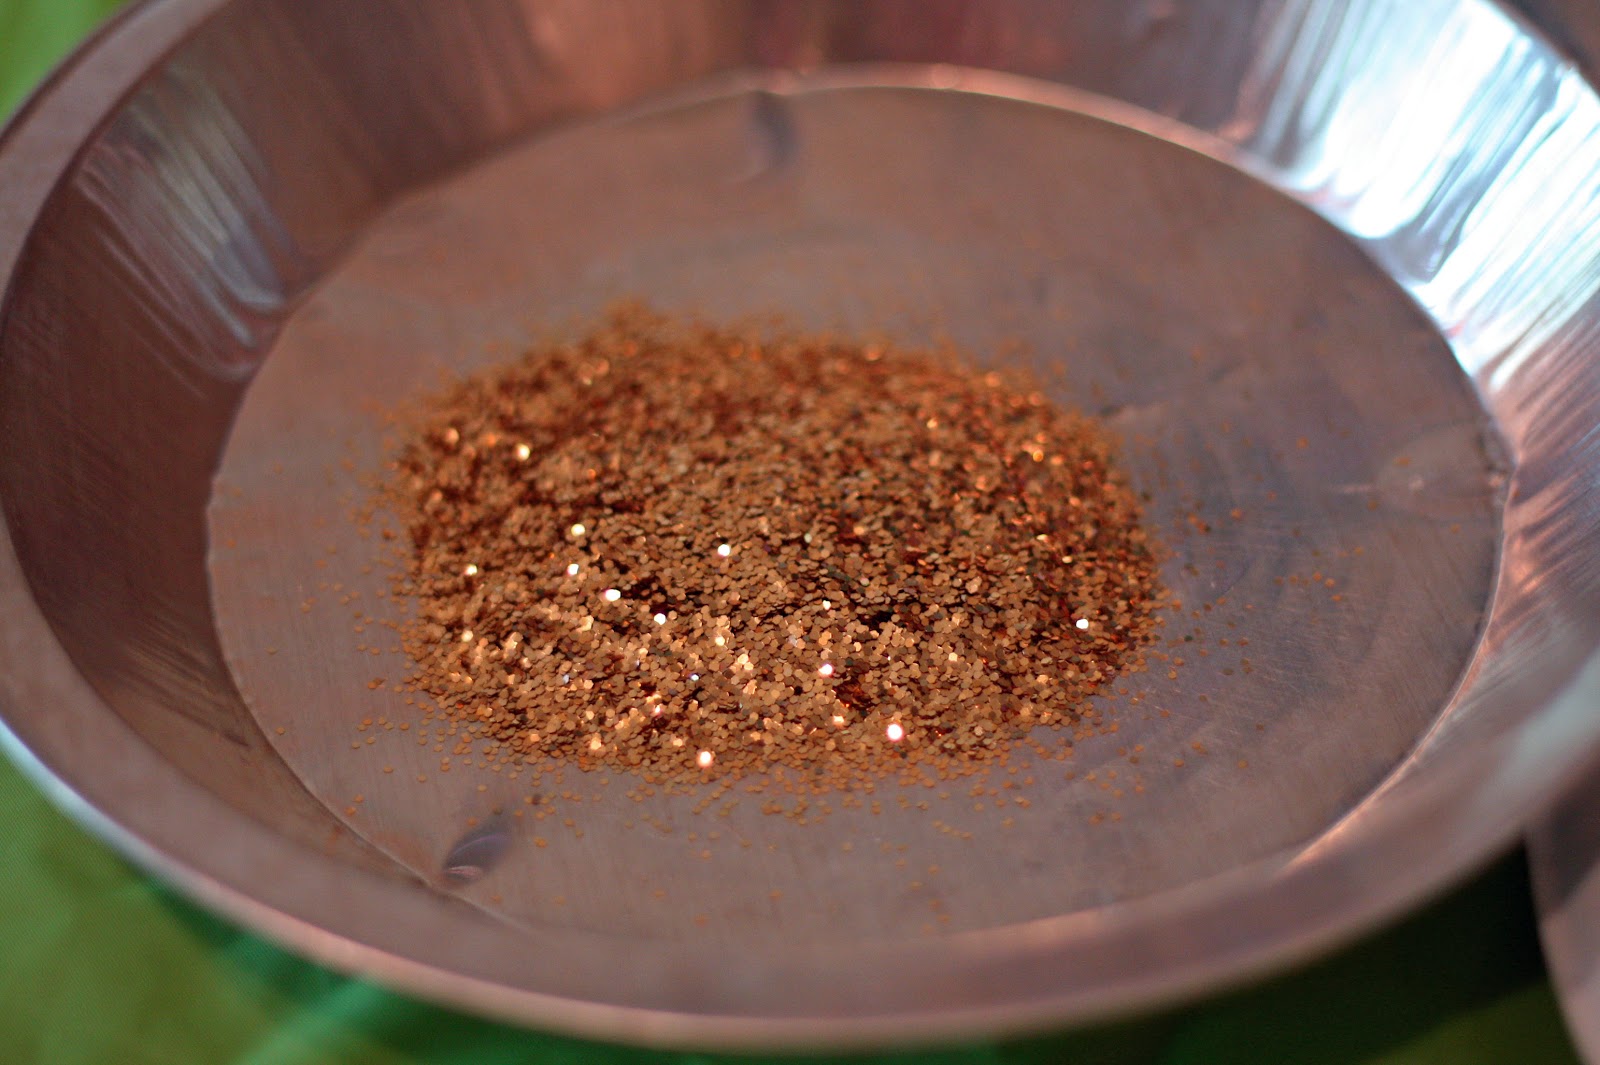
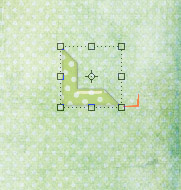
The next thing I did was chose where I want my picture & how I want it to look like it was affixed on the page. I chose the green glitter dots from another free download set. I downloaded a few that night & so I can't remember where I found them, I'm sorry! Once you open the corner tabs you'll want to grab the tab that its in & drag it down so it becomes its own window like this:


Next, switch to your moving and transforming tool:


Click on the corner tab you chose and drag it to the paper tab. Do that a total of 4 times. It should look something like this:


Next you'll need to click on the rectangular marquee tool and use it to create a guide for where the picture should go. 


Once you have the marquee up, switch to your brush tool. Its the one that looks like a paint brush. Make sure that the brush size it large enough for you to see while being small enough to fit under the corner tabs. Draw a small line at each corner to help you line up your stickers. Then, switch back to the marquee tool & click anywhere to remove the marquee.


Now, on the bottom right side of  Photoshop you'll see a tab labeled "Layers". Click that to bring up a list of all the layers you've created in this document.


Go back to the move & transform tool & click on layer 2. You'll repeat this for all for corners. Drag it the corner it goes too. If you put 4 of the same corner tab stickers on your paper don't worry, once you are working with that layer again its easy to rotate it to the right direction. Move it to the corner where you want to place it, then hover your mouse by one of the corners and you'll notice that the mouse becomes a rounded line with arrows on both sides. If you click while the mouse looks like that, the object inside the box with rotate whichever direction you move the mouse to. I tried to capture it in a screen shot but I couldn't grab the mouse. Here is what is looks like when the object is selected though:


When you are done & try to move on, a box will pop up and ask if you want to apply transformation. The answer is YES. Once you have all the corners in place, go to layer 0/Background. This will high light the paper. Go back to the marquee tool & draw rectangle using your stickers as corners. This will serve a reference line for the erasing you will be doing next. Once you have the marquee ready, switch to the eraser tool. The regular eraser is perfect. You don't have to worry about erasing around the stickers because they are not part of the background layer. Just follow the outline of the marquee then erase the rest inside. When you finish erasing, switch back to the marquee tool & click anywhere to get rid of the box. It should look like this when you're done erasing.


To add the glitter embellishments & the paper space to write on just follow the same steps you did when you added the corner sticker tabs.

Make sure that you save this as a Photoshop document so that you can manipulate the layers. If you save it as a jpeg the part you erased will turn white & you will have a hard time making the photo fit. 


Now that you've created a digital scrap book page, I bet you want to know how to add a picture to it huh? Well, keep your eyes open for the next post!!

Happy Crafting
:)

Digital Scrap Booking: Photo Journal


I've been thinking about what I can do to help my husband feel like he is still here when he goes to boot camp for 6 1/2+ months. I thought about writing him letters every day {I still probably will} or sending him pictures everyday or updating my personal blog everyday. All of this is really ambitious for me. I want to do it all; but, the facts are I will be a single mom the whole time he's gone & I'll be running my own business. I need something a little less time consuming for the day to day & I can sit down once a week and update the blog {bahaha ~ maybe!}

One of the blogs I follow is doing a thing called Project Life. I love reading her posts because she is so creative and crafty & her scrapbook pages remind me of what mine would look like if, well, if I were as creative& fun as her! So for a few months I've been watching her post these cool pictures she created for what she & her husband {and now baby} did through out the week. SO COOL! I finally decided to Google this Project Life thing & see how I could get started. 

When I start researching I tend to go on information overload & sometimes forget where I started. Honestly I forgot all about the whole Project life thing until I sat down to write this post. Project Life is bascially a scrapbook kit that comes with everything you need sans the pictures to get started on your very own scrap book. 

Did I mention before that I'll be a single mom while Sean is gone who is also running my own business? As much I as I love this woman's weekly posts, I needed to find my own way to journal our life while he is away. I need something that isn't going to create a huge mess {I have a 10 year old & a 17 month old who already do a fine job with that} and isn't going to be as time consuming as physical scrap booking. I decided that what I am going to do is create digital scrap book that is going to be super easy for me to complete in 10 minutes a day. Another nice thing about digital scrap booking is since I want to create a daily journal, I can reuse the same templates over & over again! And, if I wasn't going to use the same templates, I could use the papers & embellishments over & over again!


Here is my plan:
1. Find A Super Cute Digital Scrapbook Kit That I Love      {DONE}
2. Create Several Templates To Use In My Journal                {WORKING ON IT}
3. Keep My Camera In A Safe Place & Don't Lose It                   {I HOPE I CAN DO THIS!}


I created 2 pages in 1 night; so, I figure that I can have 10-12 page templates ready to start filling in by the weekend. Since I think this will be really easy, I think I can start on it now. I've been feeling the need to start keeping a journal; but, I always get overwhelmed when I sit in front of a book full of empty pages. I always think I need to start at 

"Well, back in 1988 my mom used to send me to school in jeans that looked like crayons had melted all over them. . . and I loved it!" 

and try to work my way forward. I'm ok with starting where I am today in my life & adding little bits to the prologue of my life as I go on. Plus pictures make all journals {and books} more interesting!

So for step one, I Googled 'Free Digital Scrap Book Kits' and feel in love with Spontaneous Delight by Carrie Stephens. Look at all those pretty colors, how could I not love it?!?!?


Here are the page templates I created so far for step 2:


I still need to figure out to label the dates on each day in a creative way, and create a few more layouts.

As for step 3, I have no idea how I am going to keep track of the camera. Maybe I'll get a special box that it goes in & put it out of reach of the little ones. . .


In the next post, I'll show you how you can create your own digital journal and page layouts!

Happy crafting

:)

Family Party: How to Display Cake Pops

I have the most creative Aunt. She is an artist who has unleashed her skills in the cake world. I had two birthday themes: "Hello, Kitty" and "Lala Loopsy" and my Aunt Lisa made the best cake pops. Well, actually they were Rice Krispy treat pops! You have got to check out Cake Creations by Lisa on her FB page!  Now to get to the featured title: 
This is one way to display your cake or krispy Pops:
 I filled several Mason jars with rice and stuck the cake pops in the jars in groups of three. Such and easy solution since I didn't have a cake pop stand. You could also do this with one large bowl full of rice.r  I should of tied a bow around each jar. Maybe next time.
 After I filled the jars with rice and cake pops, I set them on different cake stands and some on the table in an arrangement that was pleasing to my eye. I had 24 cake pops and six small cake stands. So three Mason jars went up on the stands and two went on the table.
 Can you believe the detail on these cute little cake pops!!!!

My Aunt was so wonderful to make these for the party! And if the truth be told, it was actually really hard to eat them because they looked so darn cute! ( But I am really glad that I did eat them because they were so darn tasty! I think I might even like Rice Krispy pops better than cake pops!

Happy Crafting!
xoxo,
 Amy

Saturday, April 14, 2012

Housewarming Dyson Giveaway *free blog event – accepting signups now

Mom to Bed by 8 is excited to present the Housewarming Dyson Event from June 1 to June 15. This is a free blogger event and accepting signups now.


Join the Housewarming Dyson Giveaway event today, grow your readership and offer one fantastic cleaning tool giveaway!

Tuesday, April 10, 2012

Summer Lovin' Grand Prize Is Nearly $900!!!

ATTN BLOGGERS!!! The grand prize is now worth nearly $900 & we're still waiting to hear back from several sponsors. 


We need more bloggers to sign up to help make this event a huge success; so get the word out there!! I would love to see at least 100 blogs sign up since the grand prize should be up to $1500 in no time!! 
 
Sign ups are free, just click on the Summer Lovin' Sign-Ups page in the page menu of our blog!!!


Tulle Pom Pom Topiary DIY

I really don't need an excuse. I love to make pretty things. I love to create and since we have one more family birthday party coming up, I feel like I had good reason to make these beauties. 
 I made the tulle pom poms using the tutorial I found here. However, I did modify the project a bit to make my pom pom a little bit larger. I used to 8 in paper plates as my template to wrap the tulle around.
 and they turned out like this:

To finish the look, I filled three tins with rice, tied a hot pink ribbon around the center and then hot glued the pom pom onto the top of wooden skewers.

The fun thing about this little project is that you can modify the colors to match the color scheme of any party! And all of the supplies are relatively inexpensive. Just go to your local dollar store and look around!

Happy Crafting!
XOXO,
 Amy

Monday, April 9, 2012

BBQ Beef Sandwich: Fast and Easy Lunch!

With Spring break in full swing, lunch time became very busy around here. Instead of two mouths to feed, I found myself needing to fill five hungry tummies! I love lunch time meals that are quick and easy and I bet you do too. So, I am going to share a secret recipe with you. This meal  is so simple to make and will leave you wanting to lick your plate and ask for more.
This is it.
This is the beautiful and oh so delicious BBQ Beef Sandwich:
This is what you need:
Hamburger buns
4 packages of Budding Beef - Lunch meat $0.88 each
KC Masterpiece Original BBQ Sauce  (secret weapon)
lettuce (optional)

Directions:
Empty beef packet into frying pan over medium warm heat. Add BBQ sauce to taste until warm. Pile on hamburger bun or  (toast) and top with lettuce! Serve with baby carrots.

So easy. So tasty!
Hope you love it!
Happy Eating!
XOXO,
Amy
Hope you love it!!

Sunday, April 8, 2012

Happy Easter!


 Face to Face BY Kenneth Cope 


If the Earth could give it's witness; 

All creation shout it's praise;
If the continents and oceans 
spoke to man of their devotion; 
Would mortals doubt Him so, 
if all were now made known? 


If the faithless of the ages, 

were to feel his healing power; 
if the eyes and ears he opened 
might be theirs for just a moment; 
Would it soften hearts of stone
if all were truly known? 


Face to face

so few were in that place
when heaven sent Messiah 
to reclaim this fallen race. 


If I could stand atop the mountains

and sound his name in every ear; 
If I had power to tell his story, 
like the angels have before me; 
would more sins be swept away
if the world could sense the debt he paid? 


Face to Face. 

I'll seek Him all my days. 
He means more than life to me. 
Death can't take that away. 


If I can't convince a world, 

Then perhaps I'll reach a soul, 
As i tell of how he's changed me. 
How I wait for Him to take me.
(take me home)
Then I'll worship on my knees
and kiss once wounded feet. 
Though he knows of my praise, 
One day I'll tell Him 
face to face.

Happy Easter!
XOXO,
 Amy

Bloggy Boot Camp

Tip Junkie is one of those awesome blogs that just dominates cyber space. It seems like no matter what tip I am searching for, her blog has a link to a post!


Last night I went to her site to submit our latest Easter crafts {Happy Easter by the way!} here on Amy's Craft Bucket; but, I got a little side tracked.  On the home page, I saw a post about Bloggy Boot Camp & had to follow it. I figure that this girl knows what she's doing when it comes to the blog-o-sphere; after all, I get an email a day filled with crafting idea from her site. 


Well. . .What can I say, I followed the link to Bloggy Booty Camp and couldn't wait to sign up. There are 4 conferences in 2012 & I will be at the one on October 13 in Las Vegas, NV. What a good excuse to visit my family :) The cool thing is, if you can't attend one of the 4 conferences in person, there is going to be a video conference!!

I am so excited for all the amazing knowledge that I will be walking out of this conference with!! If you are going to be near Vegas in October, come to the conference & lets meet up & learn how to rock our blogs!


GO GREEN ♥ GIVE CHARITY

Saturday, April 7, 2012

Easter Family Home Evening

Well, I had hoped to get this post out 2 days ago. But, hey at least its before Easter right? 

Every minute counts  ;)

This lesson actually was taught to my little family by Amy 2 years ago when they were down for Easter. The activity is called Resurrection Rolls & they double as the treat!


What You'll Need:
* Scriptures
* Helpful Hands
*Crescent Rolls
* Large Marshmallows {think smores size}
* Butter
* Cinnamon & Sugar Mixture


Start the lesson by reading Matthew 28 about The Resurrection. After you finish reading, tell the kids that you are going to be making Resurrection Rolls so they can see how Jesus escaped the tomb.


Have the kids each take a mallow and roll it in the butter. Explain to them that the mallow represents Jesus & the butter represents the oil that anointed his body in the burial process.


Next have them roll the buttered mallow in the cinnamon sugar. Tell them that this step represents the spices


Have them roll the mallow up the crescent roll starting at the small end. When it is all wrapped, instruct them to seal off all the openings so the mallow is buried in the roll.  Read Matthew 27:57-66. Explain that sealing the openings of the rolls is like the big stone that covered the tomb & the guards that were on watch.


Now this step, has no reference to the lesson. We just did it because it tastes good! Roll the sealed 'tomb' in butter & cinnamon sugar. Sean says this step can represent the guards. . . 

;)

Put the rolls on the pan and in the oven for however long the package says to. Tell the kids that you are going to put them in for '3 days'.  


Once they come out, let your kids see that their Jesus mallows escaped their sugary tombs!


Lastly, let them enjoy the spoils of their labor.

Thursday, April 5, 2012

Kid Friendly Easter Craft: Glitter Eggs!


Humpty Alexander Dumpty (from Puss In Boots) could not resist the allure of the golden egg, and neither could we! This is such a fun and easy activity to do with your children as long as you do a little ( and I do mean a little) prep work ahead of time! This is what we are making . . .

You will need:
Hard Boiled Eggs
Glitter
Elmer’s School Glue
Paint Brushes (one for each child)
Sandwich bags (one for each child)
Paper plate
Wax Paper or Foil or Aluminum (something that is non stick)or a paper plate

Ready for your prep? Here it is:
For each child:
1. Fill sandwich bags with glitter 
(it doesn't have to be very much- see picture below to see how much I filled my bag) 
2. Cut a small piece of wax paper or foil or use a paper plate to pour a small amount of glue on for kids to dip their brushes in.
3. Set paint brush next to child's station.
4. Pour a small amount of glitter on a paper plate for dipping later.

 Paint glue on egg. Cover Thoroughly.

 Gently place egg in sandwich bag. Seal and gently shake to cover egg with glitter.

 Remove Egg and set to dry on wax paper.
Let dry.
If there are any bald spots on egg, repaint with glue and repeat the glitter bath.
Rinse paint brushes immediately.
 Remove Egg and set to dry on wax paper.
Let dry.
 If there are any bald spots on egg, when dry repaint with glue and repeat the glitter bath.
 Rinse paint brushes immediately.

These are my kids painting eggs and having a great time!

 Glitterific!
Happy Crafting!
XOXO, 
Amy