A Dumping Ground For Good Ideas!

Everything That Makes A House A Home!


Showing posts with label display. Show all posts

Tuesday, May 8, 2012

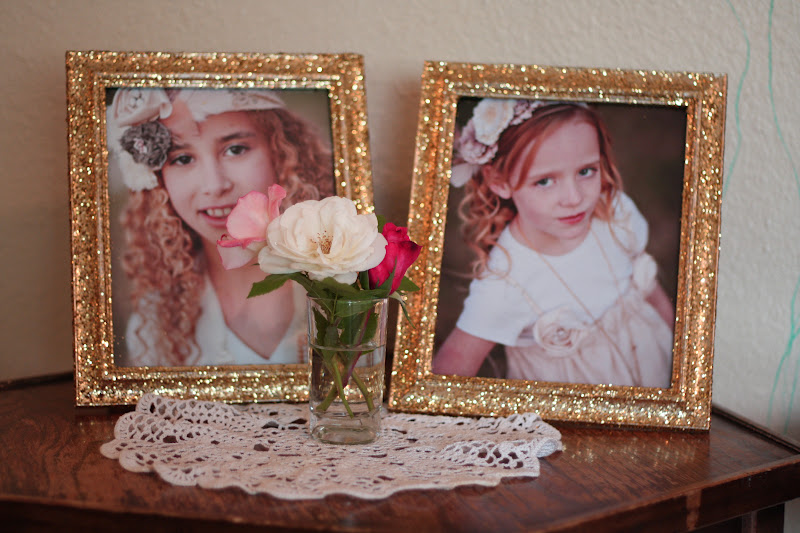
Add Glitter To Your Frame!

Man!! Life has been so incredibly busy! I am sure you know how it is, sometimes real life takes presidence over life in the virtual world. I did want to share this fun little project with you. Let me teach you how to take rock an ordinary picture frame. The secret weapon: Glitter!
I started out with a $5 gold frame from Walmart. I don't usually love gold, but this time it was my color of choice.
You will also need:
Modge Podge
Paint Brush
Glitter
Some kind of drop mat to catch excess glitter
Clear Finishing Spray. (I used Krylon Gloss Clear Protective, non yellowing, finishing spay)
I used a cookie sheet covered with parchment paper for my work space. I painted a somewhat generous layer of modge podge on the edges of my frame and immediately sprinkled glitter over the glue.
The outside edges of the frame can be tricky to get glitter on so I kind of scooped up the glitter that had fallen on the parchment paper and pushed it onto the glue.
Allow to dry completely. Drying times vary. 30  mins to an hour maybe. When your frame is dry. Stand it up right and tap it gently to let excess glitter fall onto your parchment paper. After add another layer of modge podge (paying close attention to any bald spots) and add glitter again. I repeated the process twice, but that may also vary. Just keep gluing and glittering until you are happy with your final product. Make sure you allow ample time for your frame to dry in between. Carefully fold parchment and dump excess glitter back into your glitter jar.
When your last layer is dry, move your frame to a well ventilated area and add 1-3 coats of clear gloss allowing ample time to dry in between each coat. About 10-20 minutes. When your last coat is dry, gently tap your frame to remove excess glitter. Now, if your frame is like mine, the glitter has found its way into any nook and cranny available. You can use a compressed air duster or your hair dryer on its coolest and lowest setting get rid of it.
When your frame is finished . . . display your favorite picture!!! I used these glittered frames as another decoration for my girls' b-day party. It was the perfect touch of sparkle to make their beautiful pictures a fancy focal point.
I hope you have fun with this one! Use any color glitter that your little heart desires!!
Happy Crafting!
xoxo,
 Amy

Tuesday, April 10, 2012

Tulle Pom Pom Topiary DIY

I really don't need an excuse. I love to make pretty things. I love to create and since we have one more family birthday party coming up, I feel like I had good reason to make these beauties. 
 I made the tulle pom poms using the tutorial I found here. However, I did modify the project a bit to make my pom pom a little bit larger. I used to 8 in paper plates as my template to wrap the tulle around.
 and they turned out like this:

To finish the look, I filled three tins with rice, tied a hot pink ribbon around the center and then hot glued the pom pom onto the top of wooden skewers.

The fun thing about this little project is that you can modify the colors to match the color scheme of any party! And all of the supplies are relatively inexpensive. Just go to your local dollar store and look around!

Happy Crafting!
XOXO,
 Amy

Wednesday, October 26, 2011

DIY Hair Clip Display and Two Layer Skirt

Look at those pretty flowers growing in the garden! Okay not really . . . my garden is almost dead:)

For weeks I have been trying to come up with a creative way to display the hair accessories and headbands that I make. I think I must have received my initial inspiration from my cousin-in-law, Heidi over at Honeybearlane.com. She made a beautiful centerpiece out of small tree branches. Then I saw someone at "What Women Want" with a tree branch display that earrings were hung from. And this is what I got . . . (I do have some better pictures at the bottom:) It was hard to take a picture in my usual spot because it was so windy today!)


This project is so easy and I think when I am done using it at The Festival of Tress Boutique, I will put it in my girls' bedroom to display their hair clips on. You can so do this. It is way easy.


I cut some branches from m y pomegranate tree, stripped the leaves and spray painted them white. After they dried, I simply put them in a large glass vase. I have some extra Styrofoam squares and I think I might try this again using them as a base.


I was pleasantly surprised that my head bands actually hooked on to the branches. I thought I would just be able to use my clips, but the headbands worked too!


Next . . .


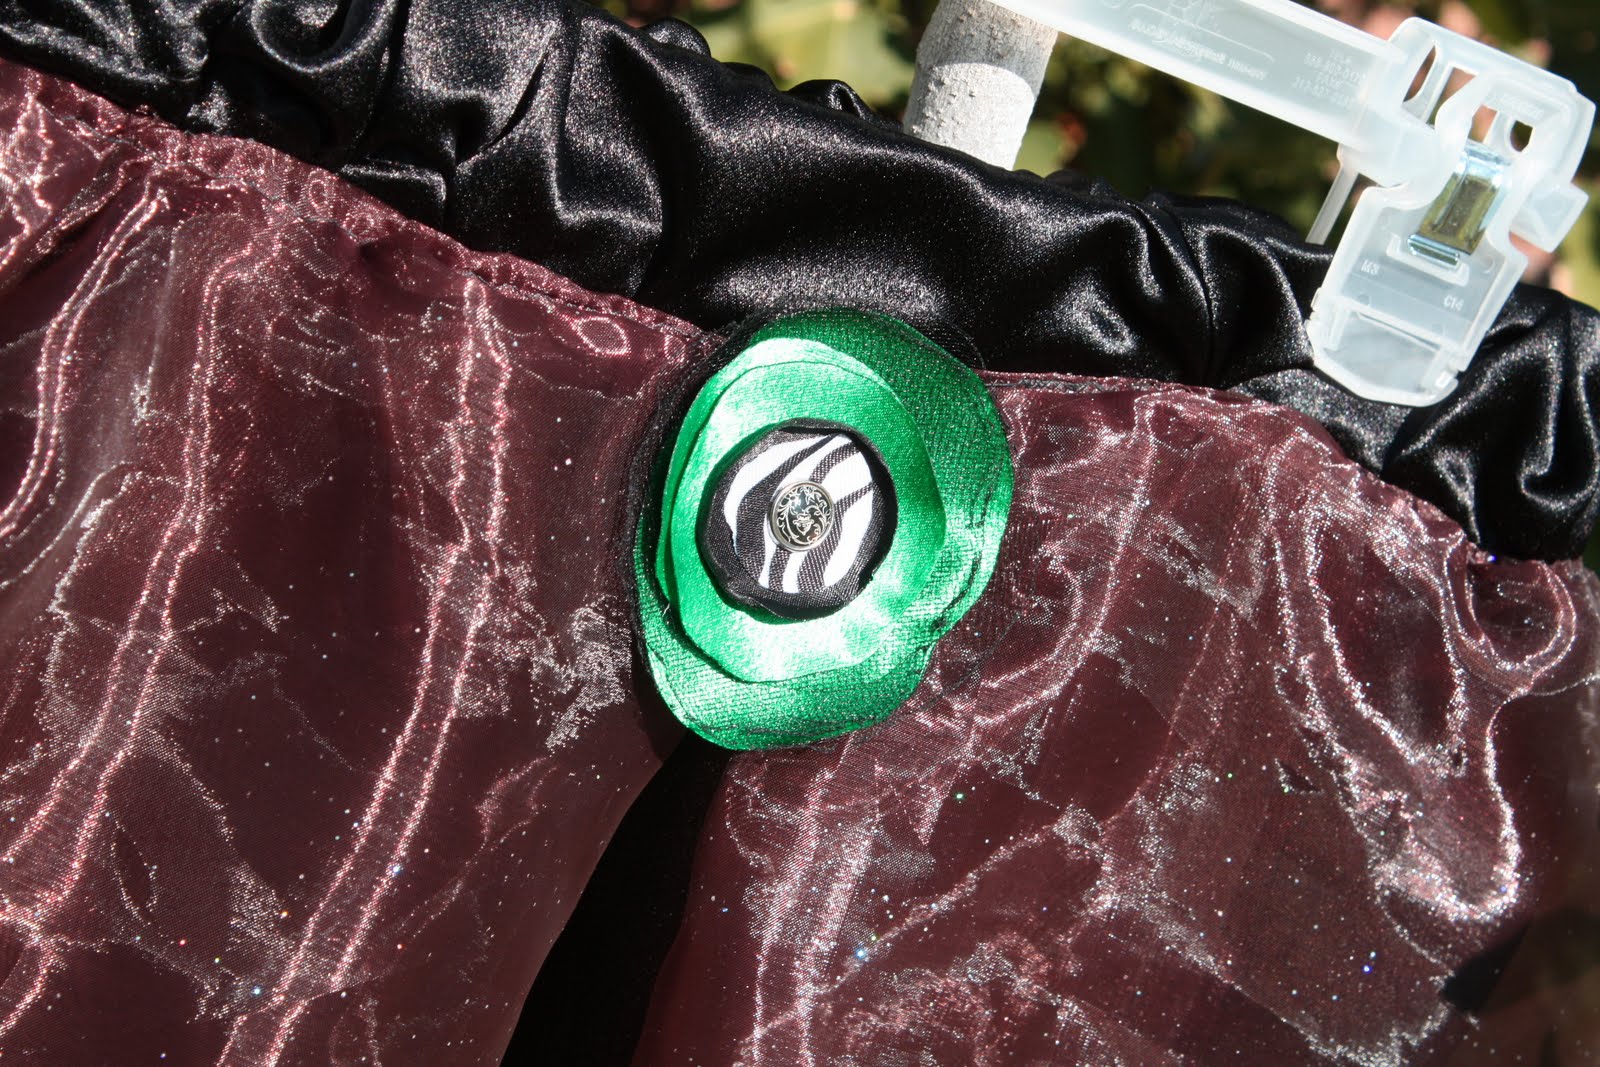
I love to make special occasions special with fun clothes for my kiddos. I have been trying really hard to make cute skirts and it seems like I am always trying out new ideas and styles in an attempt to find the easiest way to sew. I used my tutorial for the two layer skirt that I posted earlier to create the black satin bottom layer. For the shimmery overlay I actually burned the edges like you do when you are making flowers because I wanted that kind of a look. (plus, I was so sick of trying to hem this particular fabric). Then I used a gathering stitch for the top layer and sewed it to the satin layer upside down with a regular stitch. Then I folded it back over (so that it was laying the right way) and stitched it again. You can see that I made it lay and sewed it in a way that revealed the black satin underneath.


I made this skirt so that the flower embellishment was interchangeable. I took a flower hair clip that I had already made and added the pin onto the back of it. This way the skirt would be perfect for "black and orange day" (their semi Halloween celebration) at school and also for School Spirit Friday . . .


which is black, green and white.


Anyway . . . you get the idea!

Happy Crafting!

xoxo, Amy