A Dumping Ground For Good Ideas!

Everything That Makes A House A Home!


Showing posts with label photography. Show all posts

Tuesday, January 31, 2012

GIMP Photo Manipulation Program

Years ago, I told a friend that I wanted  Adobe Photoshop on my computer so I could edit all my pictures & the only thing stopping me was the price. If you've looked into or own it you know it is really expensive, like rent or a mortgage {Las Vegas prices} kind of expensive!!

He brought to my attention that there is a program on the internet that is a FREE DOWNLOAD called GIMP & its supposed to be the poor man's Photoshop.

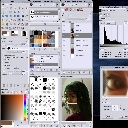
This is a GNU/Linux screenshot taken from GIMP.org


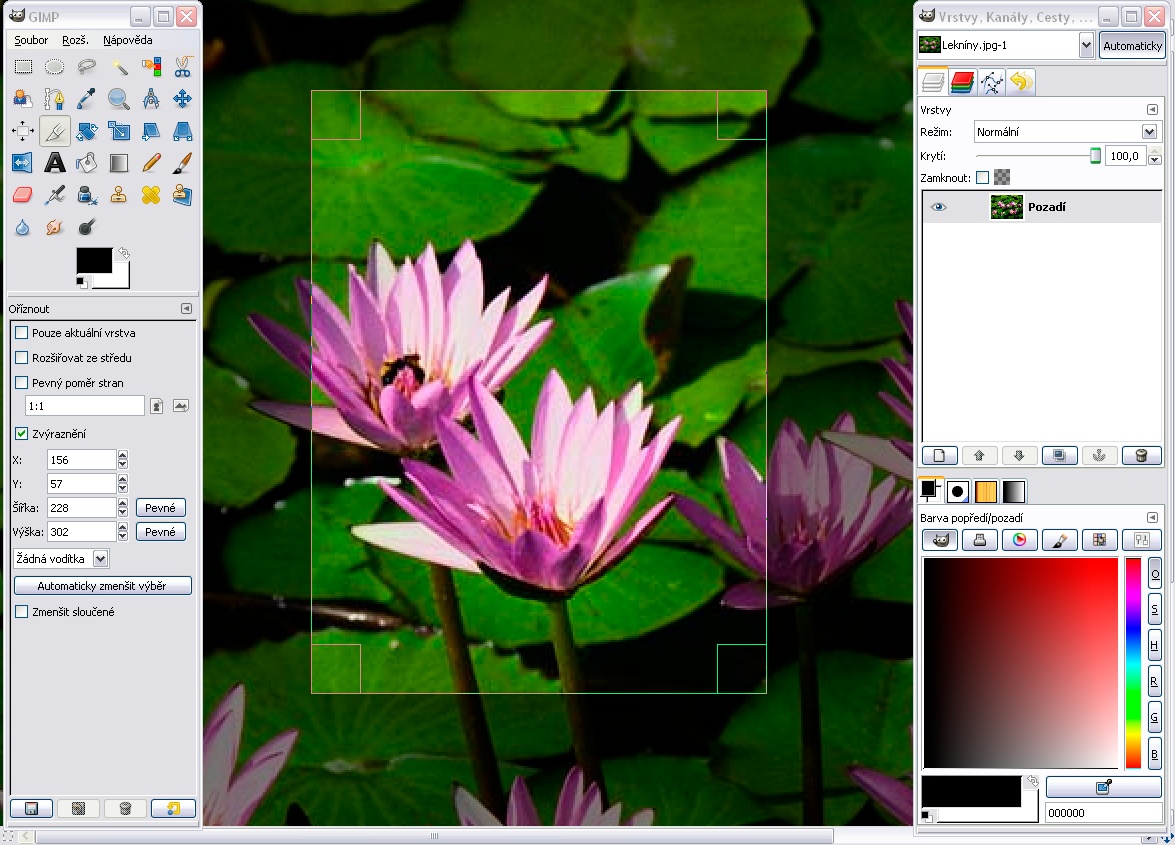
This is a Windows screenshot taken from GIMP.org

At first I wasn't convinced that a free program could come close to what you can do with Photoshop; and I convinced him that I needed Photoshop, so he installed it for me & I've used it for years. Let me just say I LOVE PHOTOSHOP. But my laptop is having issues with the cord & so I am using another laptop that is DSP ~ desperately seeking Photoshop. I decided to check out GIMP & give it a shot.

Now I don't remember how long it took to download Photoshop since it was like 6 years ago, but it seemed to take a pretty good chunk of time to download GIMP. The laptop I am using now is a mini so it may have less RAM than my other one, but I haven't checked it out. 

Once the program opened I spent a little time checking a few things out & familiarizing myself with it. I was surprised by what I found. The last free program I used was Picasa & well I was less than impressed. GIMP offers a lot of similar functions to the basic Photoshop:

In GIMP you'll find pretty much all the same filters that you find in Photoshop & you'll also find a lot of the same color tools like: 

*color balance       *hue saturation        *colorize        *brightness/contrast   
*threshold             *levels             *curves                *posturize          *desaturate

 GIMP also offers clone, healing & blur tools. The Image tools are the same as Photoshop as are the Layer options. It has a similar setup in the look of the program as Photoshop does so I can see why some people refer to is as 'poor man's Photoshop' and it does minor changes just fine. I think that for the price you can't beat it!!


There are tons of how to's posted for GIMP, just type in "how do I . . .  in GIMP" into Google or Youtube and you can find out how to do anything! 


Check out this tutorial for using selection tools in GIMP {it also teaches you how to build your own website ~ if you;re interested in that!}


 Here you can find out how to select the background of an image before you change it


I found this cool video on Youtube.  All the moves have been super sped up & if you want to learn how to do any thing in it, again just type in 'how do I . . . in GIMP' into Goolge or Youtube.


This video will teach you how to remove unwanted things from your pictures {like pimples & cellulite!}


What to whiten teeth in your photos? Check out this video.


If you'd like to have a virtual weight loss using GIMP check out this video 
~ too bad real life wasn't this easy!!


Enjoy!!!


:)

Thursday, January 12, 2012

Oversized Pictures Made Cheap

I absolutely love over-sized pictures on bare walls.

While trying to figure out how exactly Pinterest works, I came across THIS tutorial from Sugar Bee Crafts & now I can't wait to try it out.


The best part is that she said the print only costs $8 for 3 x 4 feet & the backing was $11 {which gives you more than enough for 1 print}


Happy crafting :)

Monday, November 28, 2011

New Life to Old Clothes!

If you haven't noticed yet it is my SIL Shanni who does the stuff that requires more talent. She is WAY better with a sewing machine than I am. I am kind of a make-it-up-as-I go and if -all- else -fails- use- a-glue-gun kind of a girl. Now you know . . . the secret is out.

With that being said . . .

Being a mom of four I have been many sizes in my life. That means I go through a LOT of clothes! If you have been pregnant in the last five years or so you know that maternity clothes have gotten quite stylish and sometimes I find it hard to say good-bye to some of my cute outfits. But lucky for me I had an idea . . .


I convinced a fabulous photographer to do a photog class so that she could give me some tips on how to take a better picture. Well she agreed and she wanted to do the practice portion of our class shooting a "Victorian era" like tea party. I helped her collect props and design headbands and costumes for the event and it gave me a chance to use some of my beloved old clothes.


Case in point: cute shirt, cute skirt:
they went from this . . .


To this:


I'll post some better pictures of the details later, but these two beautiful girls are my daughters. My skirt became a long dress (I measured my daughters chest and sewed in elastic that fit her measurements, then I added a really pretty rosette ribbon for straps- it is hidden under a cropped sweater in the picture- and it became a new dress. It was sew easy!)


For my fair daughter my shirt became a short dress. I flipped it upside down and sewed in elastic that measured the length of her chest. Then I put it on her to decide where I wanted the elastic shoulder straps to go. I marked the right spot on the shirt. Then I wrapped the elastic shoulder straps in fabric that matched the shirt and sewed it in place the same time I sewed the straps to the shirt. I may or may not have used a little hot glue to hold the wrapped straps in place:) while sewing. Then I added to rolled flower rosettes in matching fabric to the the front of the shirt where the elastic straps met the fabric and simply pinned those on so I wouldn't have to worry about putting them in the wash. OH, I also hemmed over the existing hem a bit to make it fit the width of my daughter's body a little better. I cut off the shirt where the sleeves began an hemmed what was once the top of the shirt. (hem, flip and hem again). Then I added another skirt underneath for color and little extra length. This was a little trickier than adjusting my skirt.


The HEADBANDS are mad of stretch lace, rolled fabric flowers, paper flowers, glass buttons, flowers and decorative brads. Lisa and I made those.


Now these little outfits look so cute on my kiddos I thought: why did I not just adjust them to fit me? Oh well, live and learn:)


Happy Crafting!


xoxo,


Amy


Friday, October 14, 2011

Cook/Klug Family Shoot

If you follow my other blogs then this will be a repeat . . . but if not . . .
This is the Klug/Cook family and they were very good to us when times were hard:) They are a sweet , playful and close knit family. This was such a fun shoot.


xoxo, Amy

Tuesday, September 20, 2011

I Shoot People!

I saw this medallion from the Rusted Chain and thought it was just so clever!


I love photography! I love capturing precious moments that would other wise become lost in the recesses of our mind. I think it is the Buddhist Monks who won't have their pictures taken for fear that such an act will cause them to lose a piece of their soul. I think it does just the opposite. I think a picture can preserve a piece of who you are and tell a brief story to future posterity.


With that said . . . here is a stage of my little boy that I always want to remember. His superhero phase. These pictures were taken on a deeply overcast day. The clouds in the sky were dark and heavy and very threatening. In other words, it was perfect lighting!


I did not pose this boy at all. I told him: "You know, most people didn't even know who Superman really was because in the day time he wore a hat, a white shirt and a tie and worked as a newspaper man." After saying that, I couldn't stop the boy from becoming a superhero!


More pictures can be found here.


Happy Crafting!


xoxo, Amy

Thursday, August 25, 2011

Make Your Own Chalk Board

** Become a follower and be entered to win a headband as soon at we hit the 50 follower mark!


___________________________


Maybe it is because school starts in a few days . . . Maybe it is because I, myself, am a former teacher . . .but for some reason I was thinking about


chalkboards.


As a kid, I always wanted to be the one who got to go outside and smack the erasers


together in an attempt to clean them.


As a teacher myself, I just wanted a white board.


But TODAY, I wanted to make myself a chalkboard!


You wanna make one too?
You only need a few things:
I used a glass frame that I got on clearance years ago from Walmart. I took the back of mine off because this frame used to have a vinyl message on it. So really it is being repurposed. You should keep the back of your frame in tact.
Chalkboard Paint
Paint Brush


I didn't really like using these craft brushes, but at the moment it was all I had. I applied two coats and let them dry completely between each coat. I wish I would have added a third coat so it may be in your best interest to do so.


In any case follow the directions on your chalkboard paint label.


This is what it looks like after the first coat.


It won't be too long before you have a product that looks like this . . .


And you can use it for all sorts of things like this:


or this


or something really cute like this:


or this:


or this:

The possibilities are endless!


Happy Crafting!


xoxo,


P.S. To see more of the Johnson Photo Shoot by Yours Truly,

Click Here