A Dumping Ground For Good Ideas!

Everything That Makes A House A Home!


Showing posts with label pictures. Show all posts

Thursday, September 29, 2011

Time For A Change! And No, That is not a pillow!

First a teaser and then an explanation:


While I hope the weather will clue into to the title of my blog post, I really mean this for you my dearest 29 followers. How you make our hearts happy! Every comment puts a bounce in our step! Thank you so much for supporting out endeavors in the world of the craft blog! We are hoping that you won't terribly mind the change of name. "The Craft Bucket" was originally meant to be like my own pinterset board until I discovered pinterest. Otherwise I would have thought of a better title right off the bat. So, our new title will be


"Made From ScrAtch."


We hope to provide you with fun crafts, recipes, sewing techniques, household tips and activities that will make your day to day activities more fun!
Please share our site with your friends!


And now . . . for the Craft!
Let's make a Beautiful Soft Covered Fabric Photo Album! It is really quite an easy craft and best of all . . . no sewing!


My cousins did this for a final during their senior year of high school. . . I never had a cool final like that!


You can really adjust this to any size you would like but to make one like mine you need:

1 yard of fabric, batting, cardboard (I used my diaper box), 5 ft of ribbon, scissors, a hot glue gun and 8-10 12x12 scrapbook paper.


I cut my card board to be 12.5 inches in ht and the width was 12 in.
Then on each page of the scrapbook paper I measured off a half inch and folded that piece back and forth a few times. That will become the spine of your photo album.


Then I glued all the hot glued all the pieces of scrapbook paper together
and created the spine . . . (p.s. you can see a bar code in this picture and it didn't matter because I will be attaching that part to the cover of the book. You should make sure that no bar codes are shown on the other pages.)


There is your spine!


I measured my fabric to allow 3 inches around each edge of the cardboard. My length ended up being 31.5 inch and my ht was 19 inches.


I didn't connect the two pieces of cardboard because I wanted to allow for the spine of the album. I left about an inch of room between the two pieces.

Then I wrapped the cardboard like a present and stuffed it with a generous amount of batting.

Pay attention to your corners and fold them as nicely as you can. Most of this area will be covered with scrapbook paper, but still, you want it to look nice:)

For the back cover I laid the batting down on top of the fabric and then laid the cardboard on top of it like a sandwich. Glue the fabric around the sides remembering to leave room for the spine.


How on earth did I miss taking a picture of attaching the scrapbook paper?!

Take the pages that you glued together and place them on your photo album so you can get an idea of where you will need to hot glue the edges of your scrapbook paper to you album. Once you have it all "eyeballed" glue the scrapbook pages to the album making sure that your spine lines up in the middle of your album.

FOR THE BACK COVER: Put the hot glue on the back side of your first scrapbook page and close the album to seal the two sides together. This will ensure that your album opens and shuts properly!


I measure out five feet of satin ribbon and hot glued the back of the ribbon to the back of the album only, then I tied the bow in the front.

I am so happy with the way it turned out!

Can you imagine all of the cute fabric/ribbon/scrapbook paper combinations you could come up with! Seriously, this project is only limited to your imagination! You could even add flowers to the front.


I think this would make a great gift as well. Fill it with your favorite family photos and then give it to Grandma! Christmas is coming you know. I'm just sayin'!

Happy Crafting!

xoxo, Amy

Monday, September 26, 2011

I've Been Framed- Hang Pictures With Ease- DIY

Forgive me for I have sinned, I took pictures in poor lighting. Many pictures. And I plan to post them on my blog. Forgive me, please:)
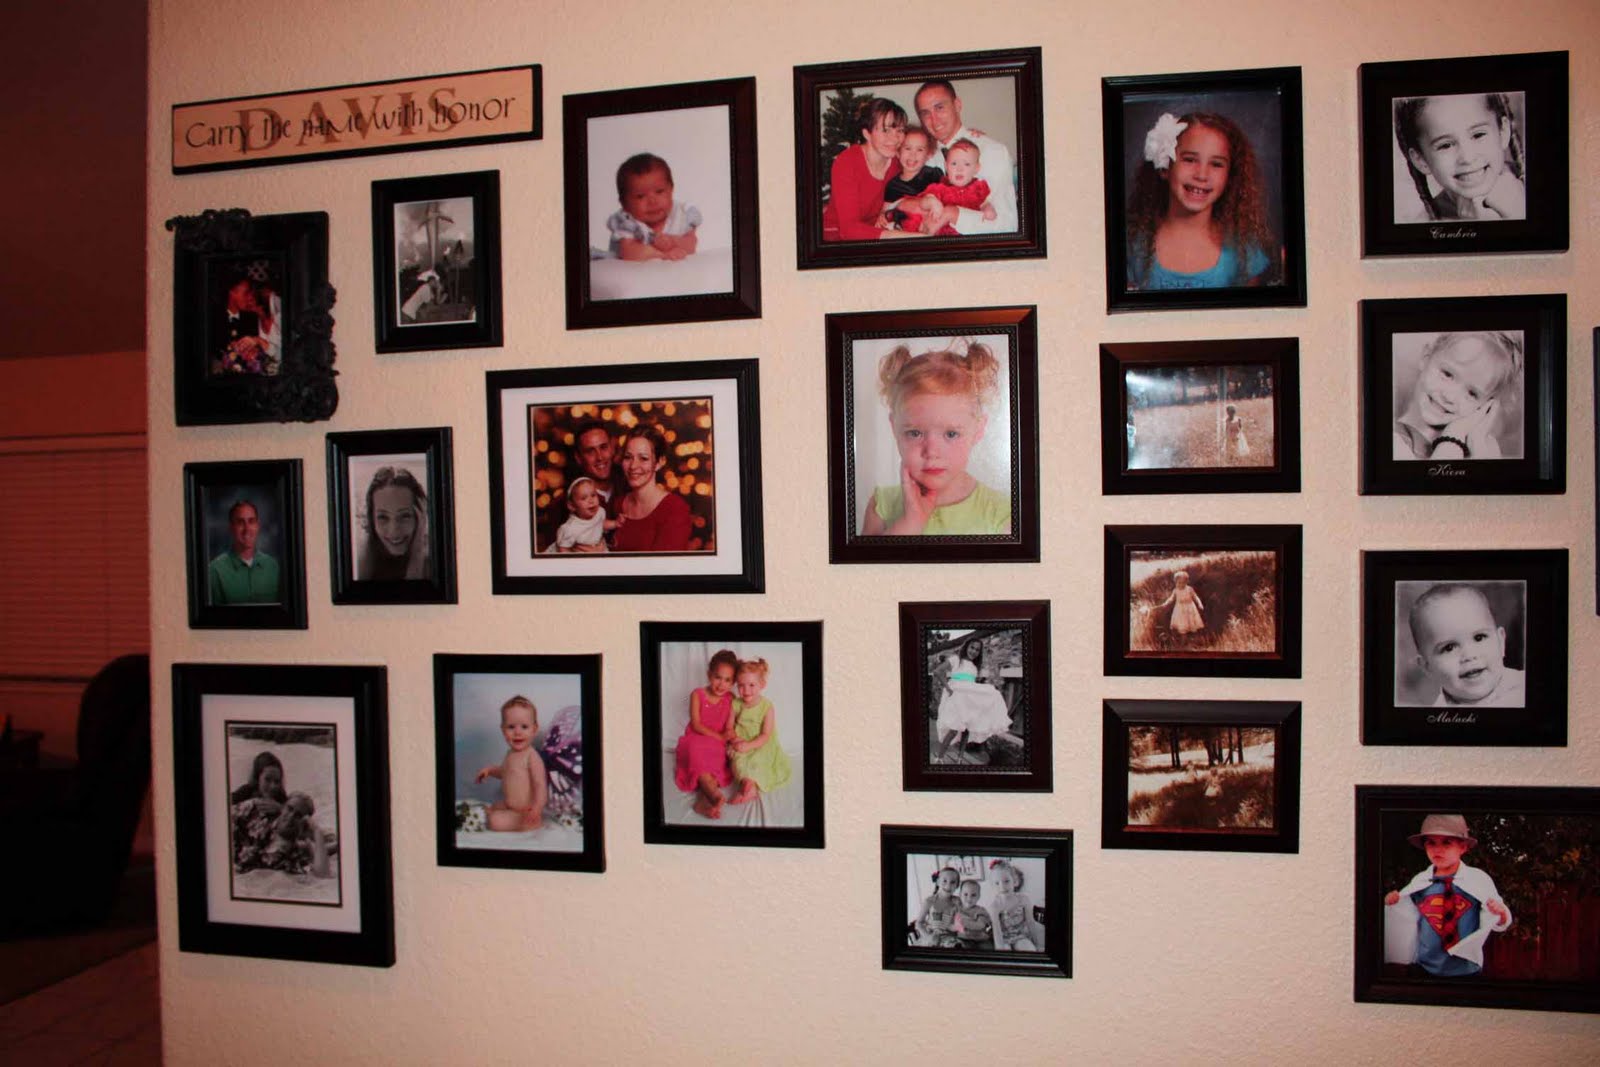
This was such a massive project! I have an EIGHT foot long wall and EIGHT years of pictures that have been sitting and waiting for something to be done with them.
Enter Ambition.
I finally decided that it was time to hang my pictures on my wall. But I didn't want to put 80 holes in the wall in order to hang 28 pictures. So, I got this idea . . .
I used butcher paper for a template.
I had to tape a massive amount of it together to make it long enough. In hind sight I wish I had used wrapping paper or something was all one piece, but hindsight is always 20/20
I spread out the paper and taped it all together . . . those cute little legs belong to my one year old:) by the way.
After I got my paper all situated and taped together (and put my two youngest to bed so that they would stop trying to run on my paper) I arranged my frames on the butcher paper the way I wanted to hang them on my wall. This took a surprising amount of time.


I decided to lay them out somewhat chronologically. I began with my hubby and I and then went to the next child and the next and so on. It became a very abbreviated story of our life.


Once I had the frames where I wanted the, I traced around every single frame with a black marker so I would remember the placement. (I also took pictures so I could refer back to my camera- 28 pictures is a lot to keep track of)


Then I hung the butcher paper on the wall using push pins, you could use painters taper.


Then I hammered a nail in to the butcher paper. Pay attention to where the hanging bracket is on the back of your frame.


Then I carefully removed the butcher paper leaving the nails in the wall


Then I hung my pictures with amazing speed! The longest part of the whole project was arranging the frames. Once I got the butcher paper up, everything was done in and hour.


I love to walk down this hall now and my kids think it is so fun to see all of the pictures too!


I hope this info can come in handy someday, eight foot wall or three foot wall, this is a great technique!


Happy Crafting!


xoxo, Amy


Sunday, August 21, 2011

A New Twist On Tile- DIY

** Another headband will be given away to one of our followers as soon as we get 50!

Become a follower today!!

___________________________________________________________


Every year at Christmastime, my Grandma agonizes

over getting the perfect gift for every single member in our family,

which is over 60 people!

Not every one understands that when my grandma gives a gift she wants it to reflect the love and knowledge that she has of the person who receives the gift.

She wants her gift to bring a smile or a tear or

a heart felt chuckle.

She wants to please.

I think my grandma may enjoy giving the perfect gift more than getting the perfect gift.


I also find joy in gift giving. I also enjoy creating something that has yet to exist before:) Knowing that it may not surprise you to know that I love giving unique and personalized gifts.


With that in mind . . . I created this for a wedding gift!


I promise . . . this looked so dang good! You can totally make this!


The Material's I used: (mostly from Robert's, but you can get them I'm sure at Michael's or any other craft store)


Mini pop up dots


Hot Glue Gun


Two coordinating scrapbook papers


Modge Podge


Photo Corners- clear


Gold or bronze stamp ink
Paint Brush


Vinyl or stickers words "family"
small wooden heart


brown twine


scissors


Picture embellishments (old key and cameo key hole from Bo Bunny scrapbooking)


Tile: mine was 11.5 x 11.5 (my friend gave me a bunch of tile but I usually buy them at the Home Depot for less than $3.


Before you do anything . . . plan out your lay out . . . once you have done that:


1. First cut, your scrap book paper to match the size of your tile.


2. Use paint brush to spread modge podge all over tile.


3. Apply scrapbook paper and rub with a paper towel towards edges to release any air pockets.


Let dry completely.


4. Trace heart onto paper. I thought I was going to use both sides of this scrapbook paper, I ended up just using the polka dot side to trace my wood heart and cut out the paper.


This is the cut out heart.


5. Modge podge the cut out heart onto the wooden heart. smooth out with paper towel. Let dry.


6. Use twine to tie loosely around picture and around old key embellishment.
(you can also use ribbon instead of twine)


7. Apply vinyl or stickers to the top of the project (once it is all the way dry)


7 and a half:) : add photo corners to picture and then place it on the tile in desired location.


I used photo corners because this was the engagement picture we received in the mail. With photo corners they can switch out the picture however they want.


8. When the modge podged heart is dry and you


The edges of your heart should look like this:


9. I used a little tape to make sure the key hung where I wanted it too and then I added a little hot glue.


10. To give my heart a slight 3D appearance I applied the mini pop dots, I didn't know how well they would hold so I also added a little hot glue in the middle. In hind sight I would have moved the pop up dots away from the edges just a tiny bit more so they be completely invisible once the heart was mounted.


11.Mount on tile.


11. I added pop up dots and hot glue to the cameo and mounted that on the heart.


It should look like this:


12: I inked the sides of the tile and the edges of the paper, using a bit more on the corners.


13. Tah-dah! Done! ( oh yeah- I did put a little sticker down by the bottom of the key- it says "love." Tah- Dah! Now you are done:)


This is the other one I made for my daughter. I got the idea from a display at Robert's using canvas( I didn't have canvas so I used tile). You are only limited by the scope of your own imagination! Go forth and create!


Happy Crafting!


xoxo,


Amy